Greetings all, and welcome to today’s dev diary on the huge supply system update coming with the barbarossa update. Before we begin, I’ll leave a heads up that this will be the last dev diary before we break for summer, so don’t expect anything new until some time in August at the earliest.
Since we last talked about supply, a few things have changed. We found that the way truck need could take off and spike was hard to deal with and that watching out so you didn't overload individual supply hubs was a bit too intensive. We also felt that the way the mapmode worked made it very difficult to project how well supply was flowing.
The iteration we have now aims at addressing these shortcomings. It's now possible for divisions to supply from multiple hubs. Trucks are now less of a strict necessity, rather something you can assign to hubs to make sure they can project supplies further away. Finally, the mapmode has changed to better show the spread of supply as well as current status for divisions.
Supply flow From each hub connected back to the capital, potential supply is projected outwards - adding up when overlapping. This is represented by the brighter colors below. For each province in distance that supply needs to travel from a hub, there is a reduction in the amount as some is lost. The amount depends on various factors like terrain, crossing rivers etc. The dark purple areas below are reduced to local supply only, and the highlighted red-orange areas indicate locations where there are units suffering from significant supply issues.

In the picture above, the Ukraine/Caucasus front is mainly struggling because it is overextending before the captured rails have been converted, so a lot of the rail network there is not operating. When a railway is taken over there is a longer cooldown when it gets converted for use by you (representing a combination of repaired damage, gauge-alteration, and general maintenance), and without connected hubs supply won’t flow.
How much you can output from each hub depends on the level of railways leading back to the supply capital, and the total max there depends on your industrial base (so Luxemburg can not feed as many as soviet union, for example).
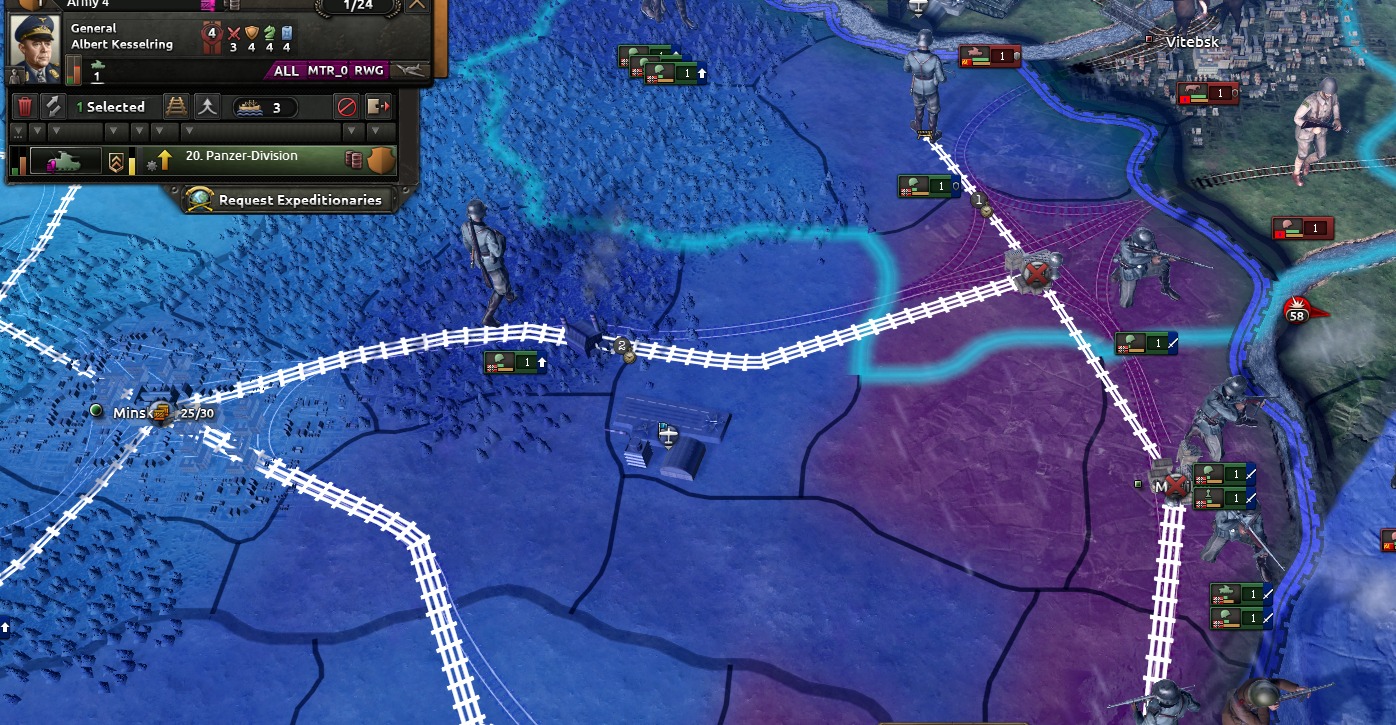
Here, the clock indicates rails that are not yet converted, and the hub icons with red crosses indicate that they do not connect back to your network.
Motorization
To increase the range of a hub (perhaps to help supply the front above better) you can choose to improve the motorization level. The horse icon on the right indicates no motorized supply from the node, but you can opt to toggle it to a higher state of motorization. Be careful, as this will cost you trucks which are taken from the stockpile.
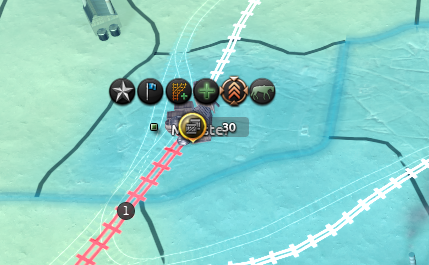
It is also possible to set the motorization level on an army, in which case it will automatically toggle on motorization for hubs that it uses without requiring further interaction from the player.

There are also some other options on a hub. The star icon lets you move your supply capital to a new location, provided that you have sufficient surrender progress. This lets you get around issues where your capital ends up cut off or surrounded, but also comes with a period of bad supply as the new location is prepared.
The blue flag next to it lets you control allied access to the node. This can be a great way to flag to an AI that you do not want them on your front, or to stop them from joining a tight landing situation.
The rail icon lets you quickly switch to construction mode and extend rails from there while the green plus will automatically queue up construction for rails to combat any bottlenecks your node may suffer from back towards the capital. The chevron icon lets you prioritize train allocation if you are running low.
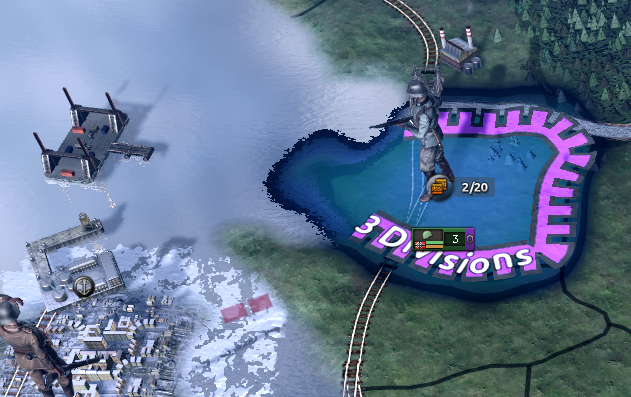
Floating Harbors As part of No Step Back, we’re introducing a new dimension to naval invasions. Floating, or ‘Mulberry’ harbors can now be constructed once the appropriate research has been completed.
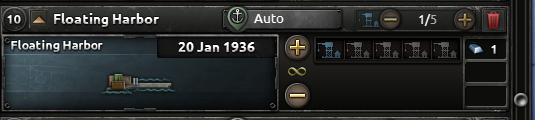
These weighty and expensive pieces of infrastructure (don’t look too close at the numbers above hehe) aren’t intended for every-day landings, but are instead intended to represent the equipment used in large-scale operations such as the Battle of Normandy.

Naval invasions utilizing a floating harbor will be represented by harbor apparatus placed parallel province targeted by the invasion, and will immediately create a stocked supply hub at their location:
Used carefully, one or more mulberry harbors can keep a sizable invading force supplied without requiring the immediate capture of an important enemy harbor. Of course, harbors should remain amongst the first targets of any successful invasion, and the supply hubs created by a floating harbor will be temporary; lasting a matter of weeks or months, depending on the strength of enemy air superiority and other factors.
Of course, there is yet more to cover regarding supply, and we'll have another diary on this subject in the future, but I hope you like what you've seen so far and we’ll be seeing you again after summer!
Oh, and one last thing - one of the new loading screens for NSB is this awesome polish cavalry, so we figured we should share it as a summer wallpaper for you (fear not, there will be a soviet one eventually!)

Read in full here:
{LINK REMOVED}https://pdxint.at/3x9gpGG