Hi Tenno,
This is one of our many Developer Workshops for Update 34: Abyss of Dagath. To see what other changes are coming in this Update, check out our other Developer Workshops here:
- Hydroid Rework
- Companion Rework
- New Player Path Improvements
- Accessibility + HUD Improvements
-
Systems Changes and General QOL
Abyss of Dagath - Dev Workshop: Accessibility + HUD Improvements:
There is so much to cover in this Developer Workshop, so we’ll keep this brief! No values are final, and everything outlined is subject to change leading up to the release of Abyss of Dagath. We’ve done our best to communicate all planned changes, but the only way to understand their true impact is to play with them once the update is in your hands.
With that all said, get yourself a glass of greedy milk and maybe a snack, as there is much to go over!
In this Dev Workshop, we will cover the following topics:
- Character Highlighting System
- Conservation Accessibility and QOL Improvements
- Auto Melee
- Buffs and Debuffs in Pause Menu
- Weapon Trait Display
-
New Update History Screen
Character Highlighting System
The enemies you face in Warframe tend to be well-themed to their tilesets -- while this adds visual cohesion to the game, it also means that your foes can sometimes blend into the landscape. To improve enemy and ally visibility, we’re adding a new “Character Highlighting” section to our Accessibility menu.
With this new system, players will be able to apply a Highlight on both enemies and allies, with a variety of customization options. Whether you want to improve avatar visibility or simply turn them a fun colour (or both!), you will be able to select the hue and intensity to your liking through the various settings:
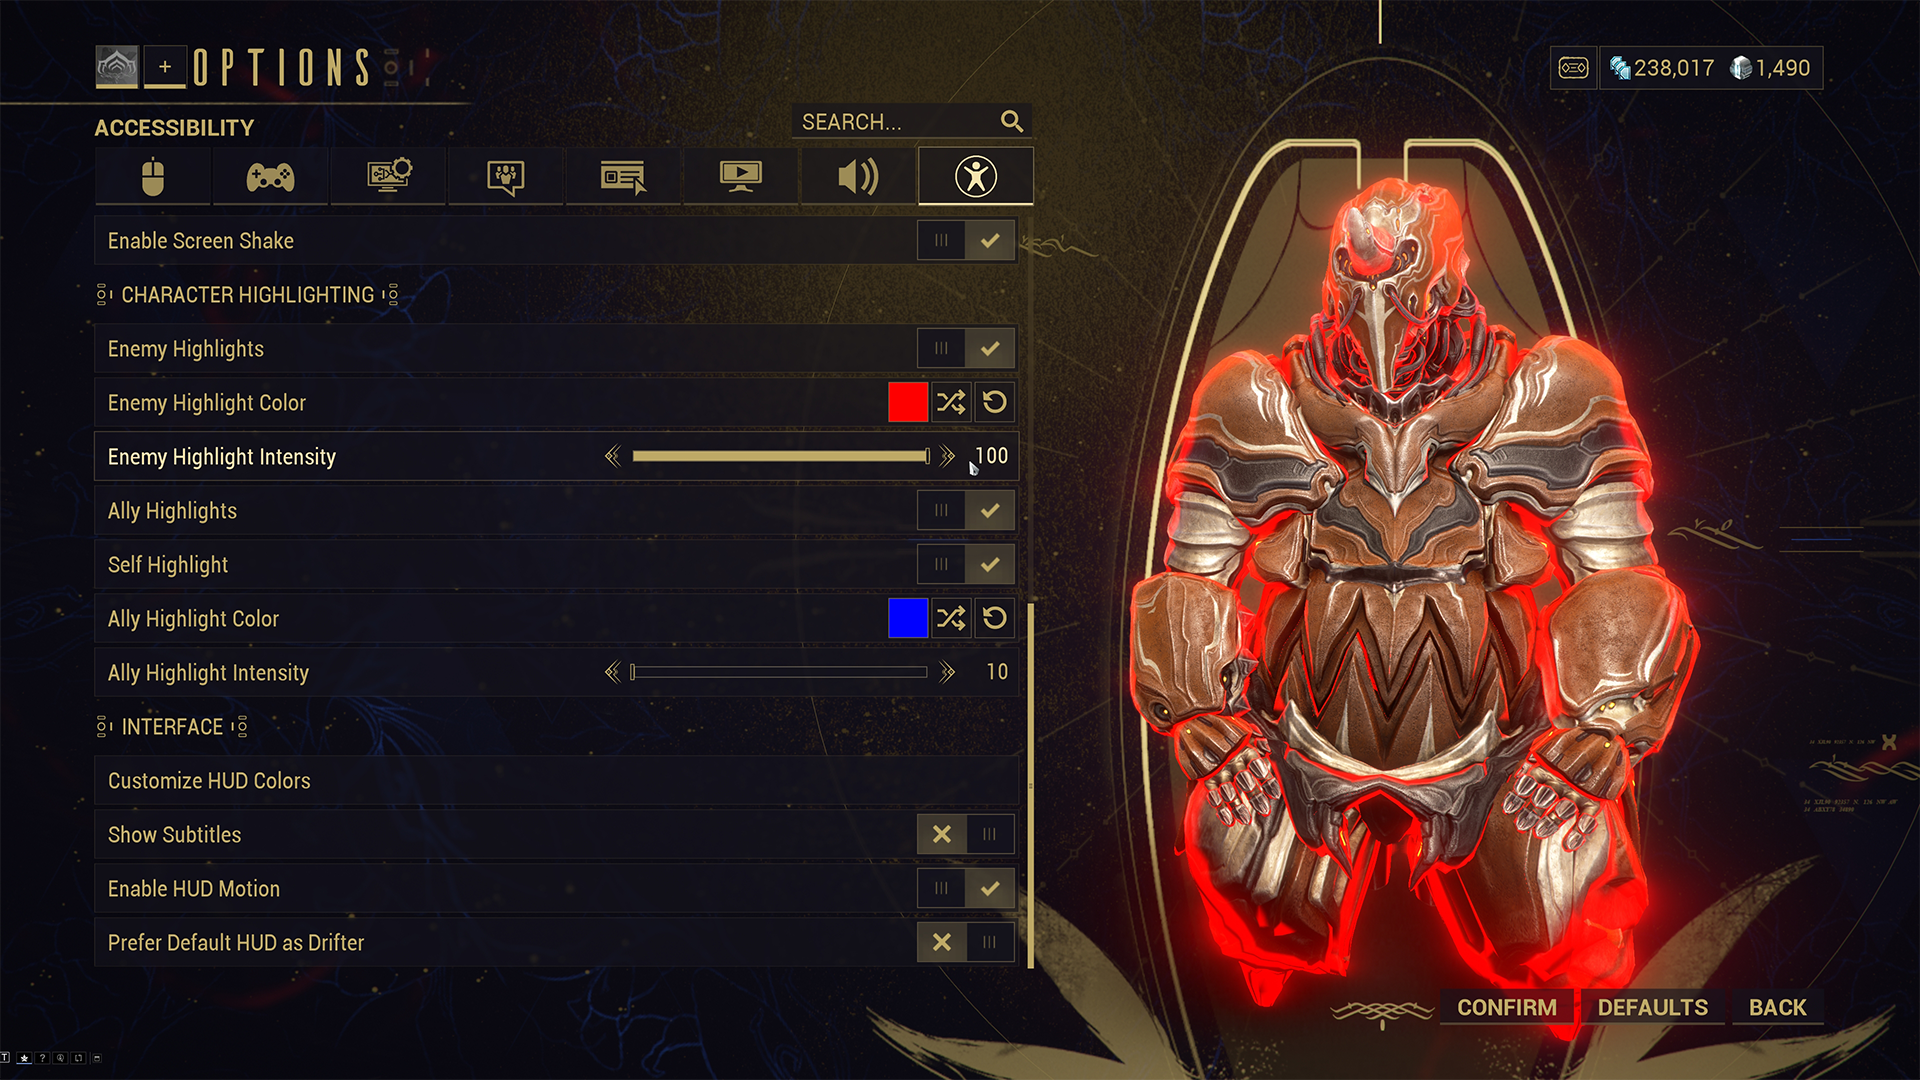
In the screenshot above, you can see the full array of settings available to you in our Accessibility Settings Screen:
- Enemy Highlights Toggle - Toggling this on applies the Highlight Aura to all enemies.
- Enemy Highlight Color - Select the colour of choice using the Accessibility Color Palette or any other owned Color palette.
- Enemy Highlight Intensity - Choose how bright you’d like the Highlight to be using this sliding scale.
- Ally Highlights - Toggling this on applies the Highlight Aura to all allies, including but not limited to: Squad Members, Companions / Sentinels, and Specters.
-
Self Highlight - Apply the Ally Highlight settings to your player avatar.
- This will persist anywhere you take your Warframe or Tenno, such as your Orbiter, Quests, etc!
- Ally Highlight Color - Select the colour of choice using the Accessibility Color Palette or any other owned Color palette.
- Ally Highlight Intensity - Choose how bright you’d like the Highlight to be using this sliding scale.
Interacting with the Color and Intensity options will preview the effect on your Warframe in the menu screen, giving you an idea of what it’ll look like in-mission! Here is a preview of gameplay with this system in action:
SpoilerVideo description: A Grendel, MOA Specter, and Kavat in the Simulacrum with Green Character Highlights applied. Various enemies from all factions have also been spawned, and have a Red Character Highlight applied. The Accessibility Menu is opened to the Character Highlight section, where the colours of character highlights are changed by selecting different colours via a colour palette. The menu is exited to show the new result: Grendel and his allies in yellow, and enemies in bright pink.
A few key characteristics of note for this system:
- “Friendly” enemy units such as those seen in Invasion missions or those affected by Revenant’s Thrall / Nyx’s Mind Control / etc. will use the Ally Highlight settings to differentiate them from your true foes.
- Character Highlight Settings are accessible in-mission should you need to make any tweaks on the fly!
- The majority of Quest cutscenes will not see Character Highlights in action, except if Self Highlights are applied.
Conservation Accessibility and QOL Improvements
Conservation has had a long storied history with quality of life and accessibility changes, but we can confidently say that this is the biggest batch of improvements yet! Because there’s so much to cover, we’ve broken it down per Conservation stage:
Icons on the map:
- The animal's name now appears when hovering over the trail icons in the advanced map!
-
Holding your Tranq Rifle will now show the icons of the closest Trail Start Points in your minimap!
- Only one icon will appear per animal, to help you better plan your route on foot.
-
Each animal trail icon now uses the animal's silhouette (instead of the generic pawprint) and is color-coded for quicker visual identification! The hue matches that of their Echo-Lure.
- This slipped out a little earlier than planned with Echoes of Duviri (Update 33.6)!
- Players can now select an Icon on the advanced map to spawn a special waypoint marker to the Trail Start Point. This marker will persist even after putting your Tranq rifle away!
Video description: Grendel on the Orb Vallis landscape. He pulls out his Tranq Rifle and opens his Advanced Map. A variety of Conservation icons are available for him to choose from. Grendel selects a Bolarola icon and clicks on it. The icon creates a waypoint that persists after he closes his Advanced Map (which he does). The player then summons their Archwing and flies to where the waypoint leads them, which ends up being a Bolarola Trail Start point. Grendel interacts with the start point and footprints spawn, at which point the waypoint disappears.
Trail Start Points:
It all starts with scat! Unfortunately, many trail start points can blend into the landscape and otherwise be difficult to find. We’ve made the following changes with this in mind:
-
Trail Start Points will now be highlighted with a diamond marker with the Tranq Rifle equipped. Simply holding the Tranq Rifle will show these markers at 20m away, while aiming down the scope will reveal them from up to 50m away.
- This diamond marker functionality already existed with Echo-Lures, but we are extending it to Tranq Rifles as well.
- Trail Start Points will now glow similar to footprints when viewed through the Tranq Rifle scope.
Follow Tracks:
- Updated our footprint shader to improve animal footprint visibility and address issues of them disappearing below rocky terrain.
-
Once interacting with a Trail Start Point, a yellow area highlight will appear in your minimap over the last section of the tracks you found. Additionally, we have added diamond markers at key checkpoints in the footprint path that appear when looking down the Tranq Rifle scope.
- If you happen to lose the trail or get turned around, these two mechanics should help you!
Locate and Tranquilize:
-
Adjusted the audio and visual cues from the Tranq Rifle to play more or less frequently depending on how far away the animal is.
- The more often they appear, the closer you are!
- Ally Character Highlights will apply to Conservation targets as an extra way to distinguish them from the landscape, should you wish to use that system!
-
Added a flashing paw icon that points you to the direction of the animal when looking down the Tranquilizer scope.
- With the successful use of the Echo-Lure, the replying animal call already comes from the direction that they spawn in. We’re adding this new visual clue for Conservationists in addition to the existing audio cue!
- Note: This functionality also applies to free-roaming wildlife you find on the Landscape, no Echo-Lure required!
Video description: Grendel on the Orb Vallis Landscape with his Tranq Rifle equipped. He aims in on the Trail Start point before him, showing how it now glows the same way that footprints do. He then aims off to the left of him, at which point a flashing pawprint icon appears in the left side of his screen. When moving his reticle towards the direction of the flashing icon, it eventually comes to rest on a Bolarola. The flashing icon stops once his reticle comes to rest on the Conservation target, as that was the animal that was triggering it.
Auto Melee
Adding an Auto Melee button has been a frequently requested topic over the years as a way to mitigate repeated button presses. Your days of spamming E are over with the new Auto-Melee function coming with the Abyss of Dagath. Here’s how it works:
With Auto Melee, players will be able to trigger melee swings through the familiar repeated melee inputs, or they can simply hold the melee input button to repeatedly swing their melee weapon for as long as that input is held. Combos can be executed while auto-meleeing by simply adding the required inputs -- i.e. to start Slide Attacking, simply start sliding while holding the Melee Input, etc.
In short, the Warframe melee that you know isn’t changing -- the only difference is that instead of needing to press your E hundreds of times, you only need to press (and hold!) it once.
Our goal is not to alter the main way you play Warframe melee if you prefer the precision of individual inputs -- auto-meleeing is an additional way to play the game. This mechanic is releasing as a permanent functionality of the Melee system, as we’ve designed this so that both individual input and auto-melee can co-exist without issue.
Since Auto-Melee is removing a lot of the active element of meleeing, we are working on an addition to this system called “Perfect Heavy Attacks” that aim to release with Whispers in the Walls.
Exclusions to Auto Melee
Due to the mechanics of Auto Melee mirroring that of thrown melee weapons, the following weapons will not have Auto Meleeing enabled for them:
- All Glaive Weapon Types
- Wolf Sledge
Buffs and Debuffs in Pause Menu
The meme of Octavia players giving their squadmates enough buff indicators to look like an MMORPG screen is real and valid. Worry not -- we’re not changing the buffs you get, we’re simply adding the ability to see what the actual Buff and Debuff Icons mean when entering your Pause Menu:

Image Description: The Warframe Pause menu. In the upper right-hand corner, below the currency bar, there is a list of buff icons applied to the Warframe in-mission. The mouse is hovering over the Wisp Haste Icon, showing the buff name (“Haste Mote”) and description (“Increased movement and Attack Speed”).
As you can see in the screenshot above, hovering over the icon will show you the effect’s name and possibly the description. Our goal is to eventually add a description for every icon, but at the time of writing, we estimate that there are around 800 icons needing descriptions, and unfortunately, the majority of them require a bit of work to get set up. We will be working on this system and releasing icon descriptions in batches wherever we can!
Weapon Trait Display
Weapons with specific traits or passives will now display this information in the Upgrade Arsenal screen of the respective weapon. These traits were often hidden in weapon descriptions or otherwise required players to learn about them via outside sources -- now you can directly see any special traits a weapon has and incorporate that knowledge into your builds.
![]()
Image Description: The mouse hovering over the new Weapon Trait Display section of the Upgrade screen, which is positioned to the left of the Stance Slot in this screenshot. There is a custom icon for the Dorrclave (a new weapon), the phrase "Unique Trait", and below that, the title of the Trait ("Rising Vendetta"). The mouse hovering over the section has caused an on-hover description box to appear, displaying the following: "After 20 kills or assists, gain an additional 0.5 Follow Through and at least one guaranteed Status Effect for the next 20 attacks".
New Update History Screen
Whether you’re jumping straight into a new Update or returning to the game after a break, our New Update History Screen is designed to contextualize and highlight the latest content. This screen offers a variety of new tools for us to showcase everything that is available in our major update releases.
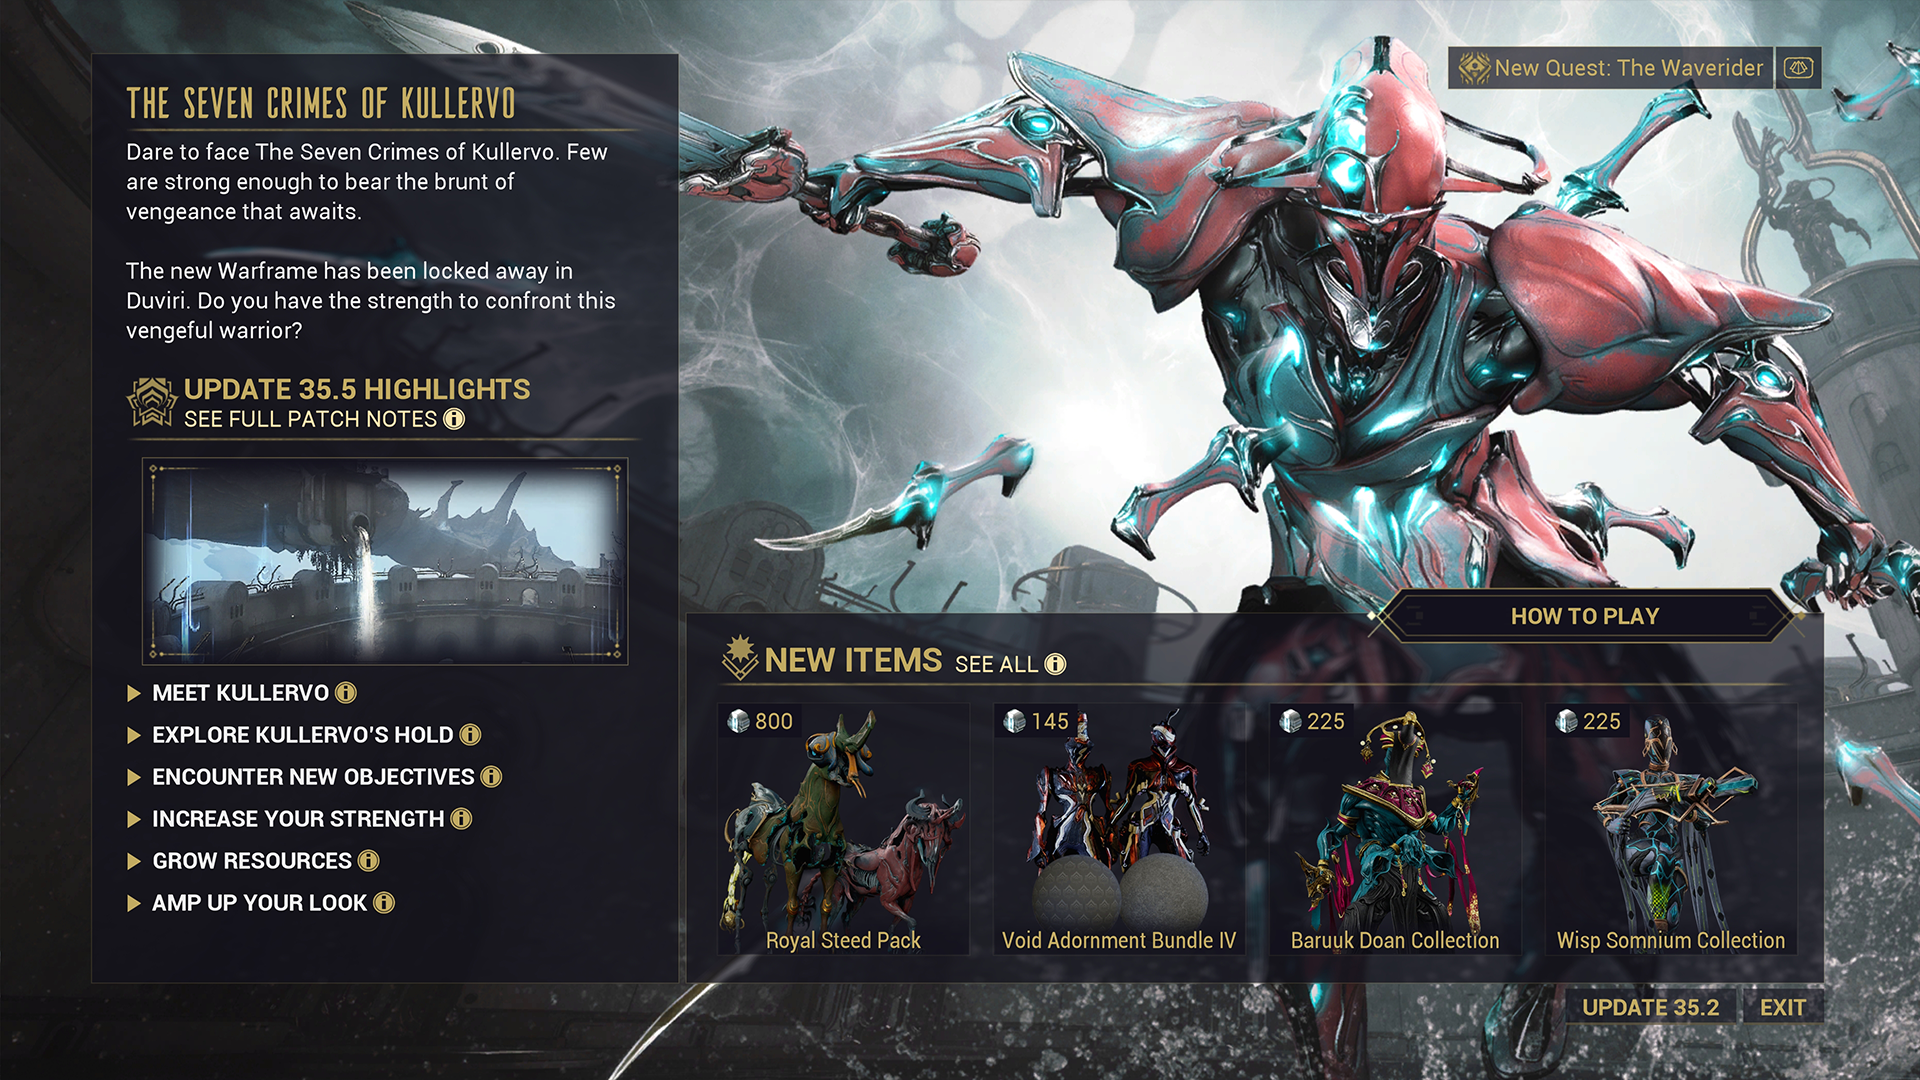
In the screenshot above, you’ll see various sections designed to contextualize and highlight released in the specific update, including:
-
General overview blurb for the update!
- Familiar as this is what we’ve done for past updates.
- Patch highlights, which can be interacted with to reveal a pop-up window with lengthier descriptions of new features, game modes, etc., released in the update!
- Direct link to the update notes on our website.
- New item showcase to highlight new content available in the market.
- “How to Play” button that will either direct you to a tutorial or take you straight to the Star Chart to engage with the new content.
-
Update History at the bottom of this screen, allowing you to look at Update Screens for previous releases.
- Our goal is to have at least Abyss of Dagath and the Seven Crimes of Kullervo here for launch!
Where to find this screen
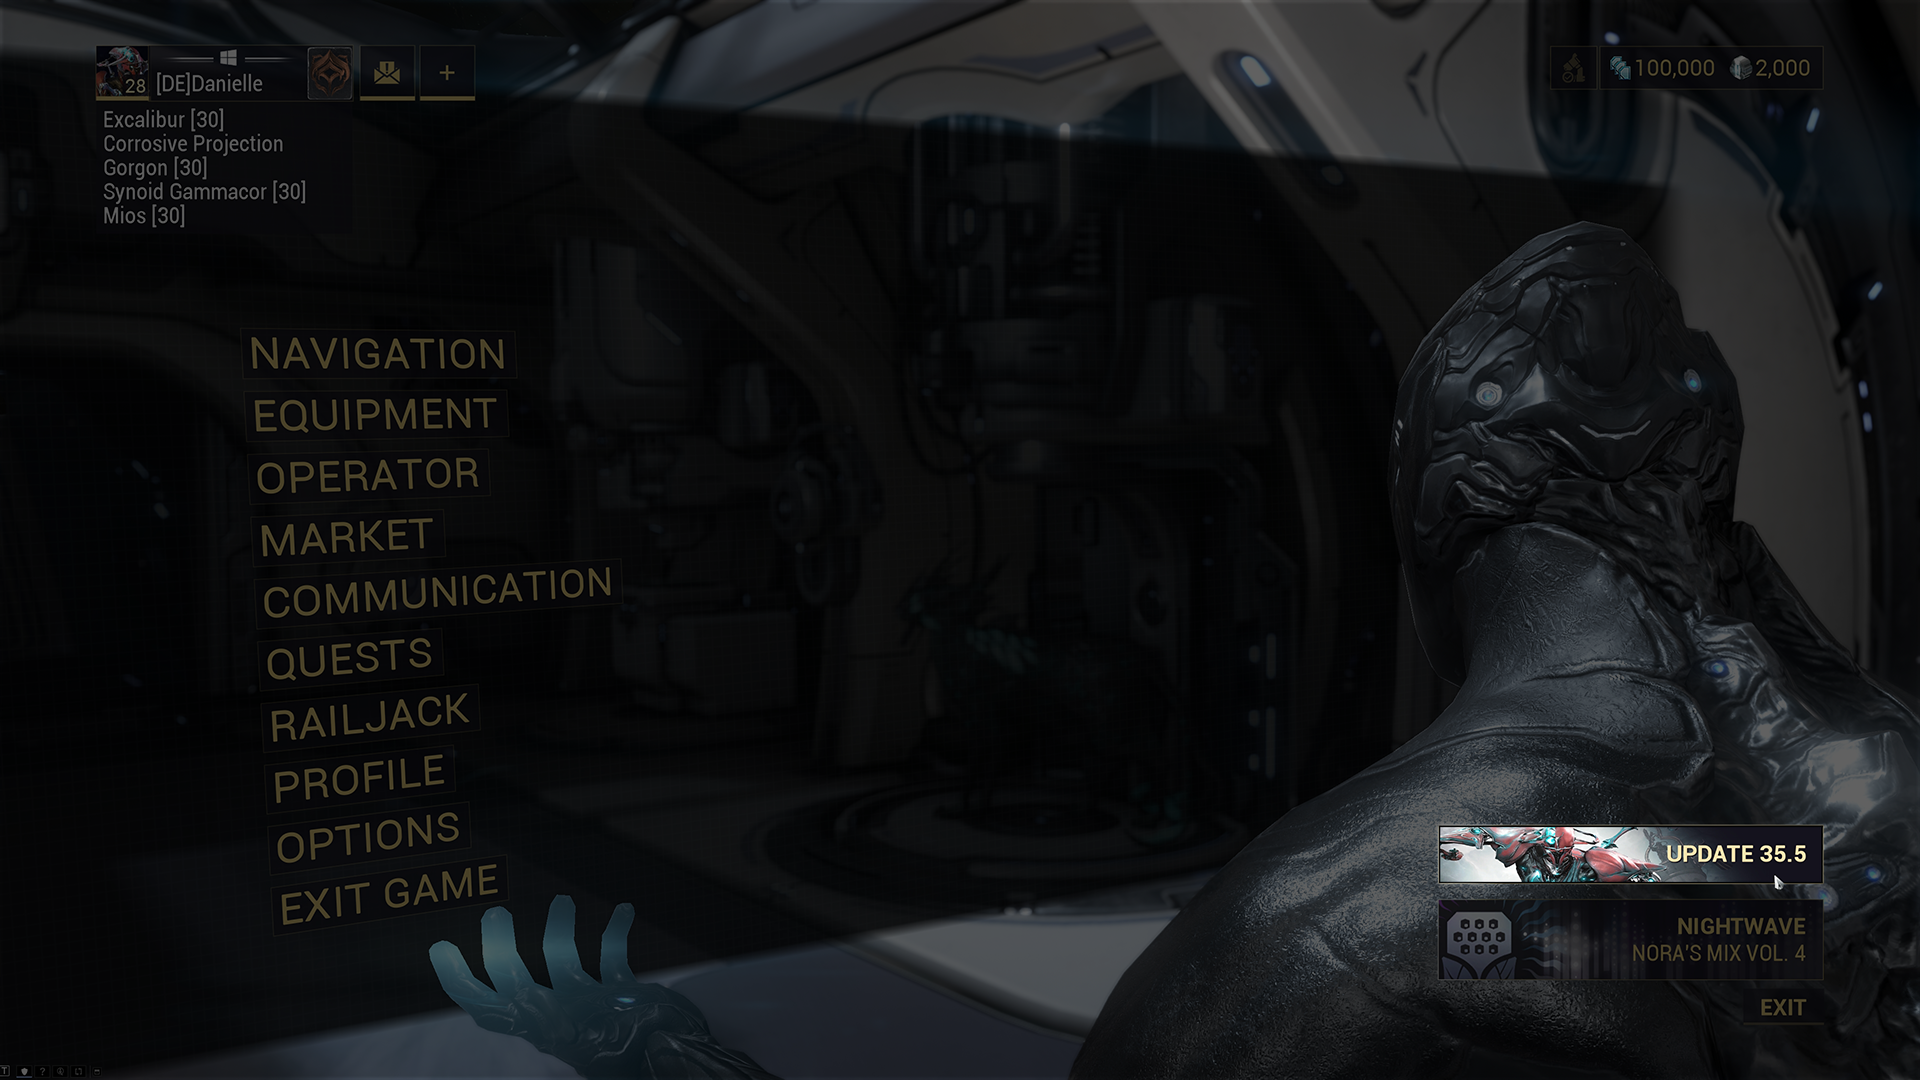
This new Update History Screen will present to players the first time they log into the game following an update, but it can also be accessed any time at two locations:
In the pause menu above the Nightwave button.
Spoiler
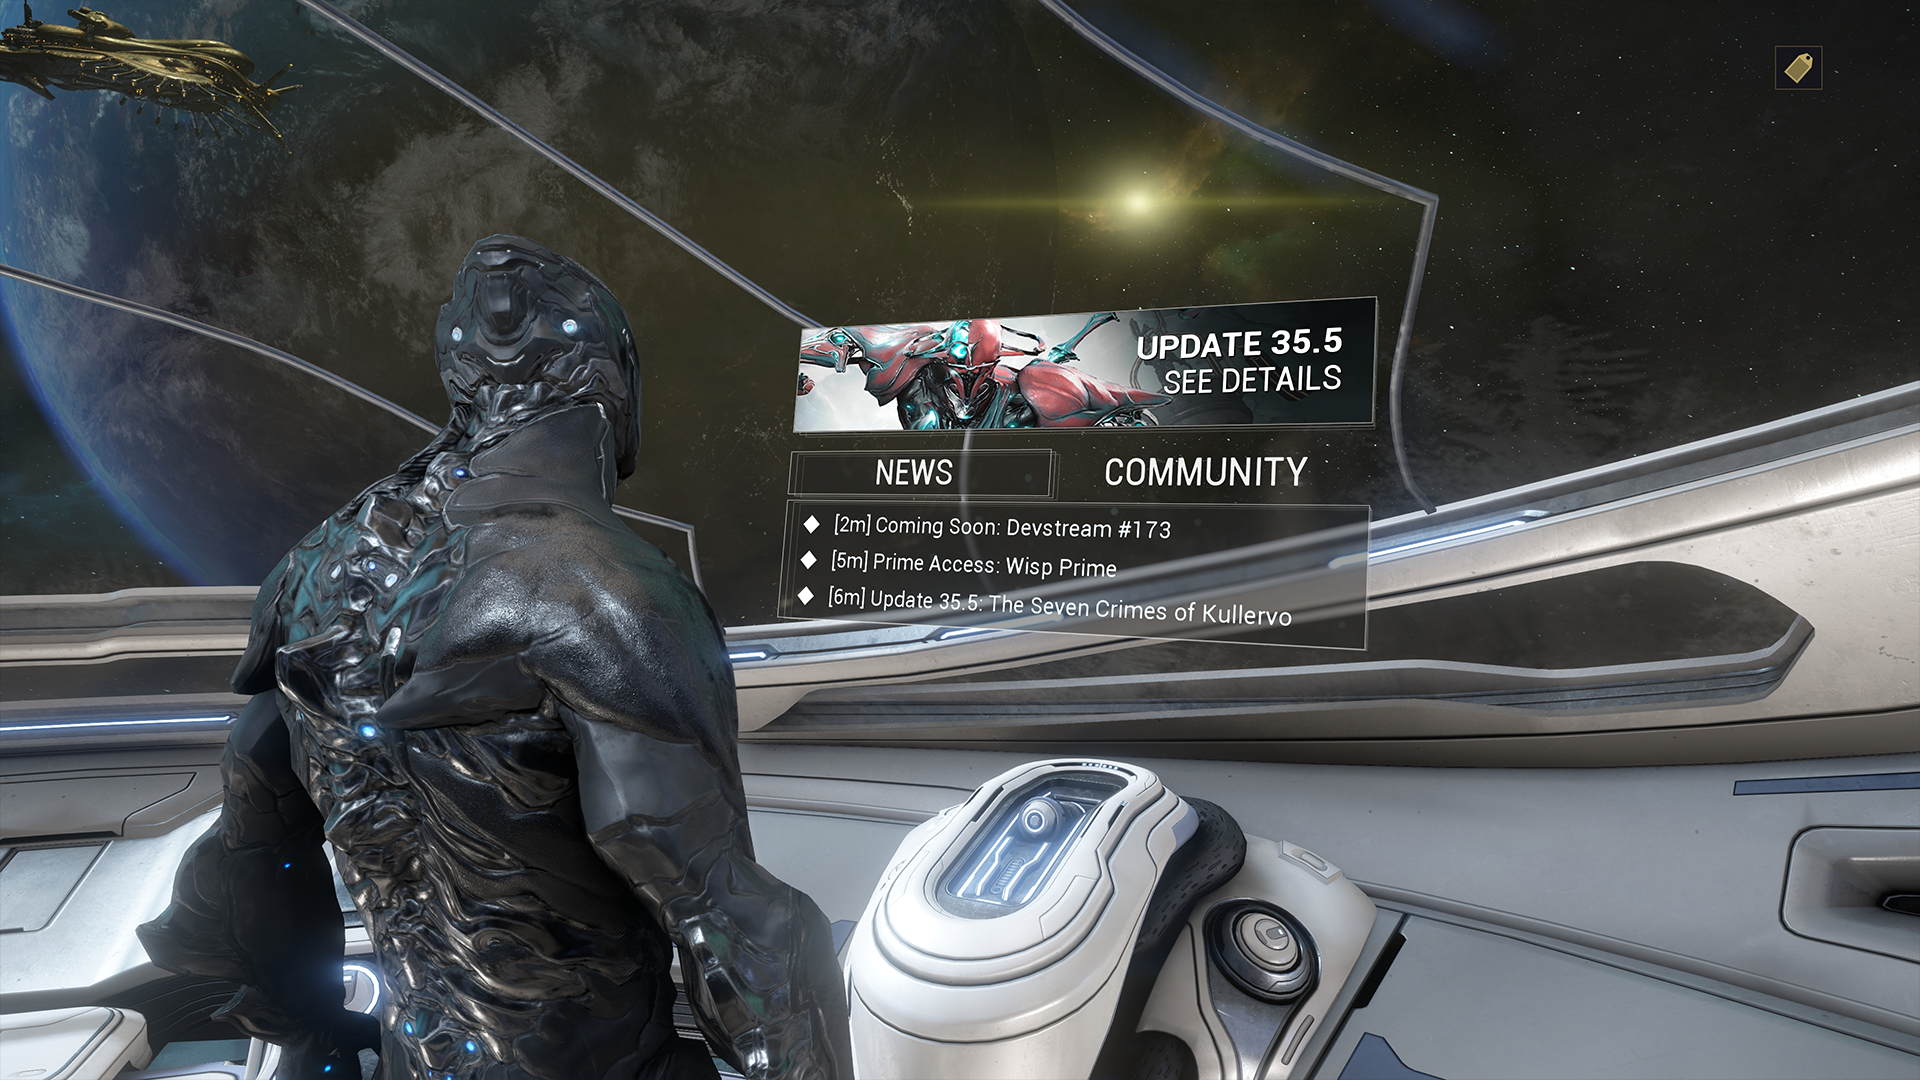
Via the new banner over the News console in your Orbiter!
Whether you took the time to review the entire Dev Workshop, or skipped to the sections that were relevant to you most, thank you for reading! We’re excited for you all to get your hands on these changes and more with Abyss of Dagath on October 18th!
