
Heyo Everyone, Welcome to a series of dev blogs called Darktide 101. We’re interviewing different devs working on Darktide to share what it’s like to create the game. These dev blogs will include topics like level design and cinematics, voice acting and audio, and more (based on your suggestions)!
For today’s blog, we’re starting with level design and cinematics for Darktide. This is currently an introduction to these topics, because there is truly so much to talk about. If players are interested, we’d love to talk more about taking a mission to functional, adding in the art and audio cues, lighting and iteration, etc. Let us know!
Level Design
While creating a level in Darktide always follows a well established production process - a production blueprint if you will - each new level brings its own set of challenges and creative opportunities. We think of ways to innovate and improve within the experience players have come to expect, for the sake of consistency. You may also have noticed we sometimes make changes to previously released levels after looking at how players interact with them.
Before we begin laying the foundation for a level, we take a step back and define the backstory and narrative for a mission. We ask questions like: What kind of location was it before current-day events? Is there a specific reason for Chaos forces to be there now? What is the Warbands’ (or other parties..) interest in it? One typical question we always try to justify is: why couldn't Masozi simply fly us to the end of the level from the get-go?
After answering these questions, we begin with a paper design of the mission, known as the Mission Design Document (MDD). The MDD becomes the blueprint for the mission, outlining how we envision it playing out. It includes detailed descriptions of every part of the mission, ensuring everyone on the team has a clear idea of the mission's flow.
The MDD details:
-
The Plot: A short summary of the plot of the mission.
- The Setting: A detailed description of which part of the Hive the mission takes place and the different areas we intend the players to go through.
- Game Mechanics: The types of game mechanics we intend to use during the mission. Particularly how we envision the event in the mission to play and how we intend to challenge the players during the events.
- Mission Areas: Descriptions of different areas within the mission, which we call “chunks.”
We use the term “chunks” to refer to different sections of a mission. Each chunk varies in gameplay to keep the experience fresh and engaging. A mission in Darktide is typically split into several chunks with distinct topologies that blend seamlessly together.
(Note: Comparing each chunk to a battlefield in the tabletop form of Warhammer 40,000 is not a stretch.)When thinking of a chunk, envision a maze, street, or open plaza within a level. Designing in chunks allows us to offer variety, opportunities, and challenges tailored to different player archetypes.
What makes a level fun depends on your playstyle, so we try to vary the gameplay spaces in a mission to give each playstyle its moment to shine and to provide interesting challenges. Since Darktide is primarily a co-op game, if you find yourself in a chunk that doesn't suit your playstyle, you’ll ideally have a teammate with a build that's better suited for that environment.
Once we're happy with the MDD and everyone on the team has signed off on the ideas based on their expertise, we start building the mission in the editor. It takes a group effort to create a mission, involving not just level designers but also environment artists, level artists, sound designers, gameplay coders, lighting artists, writers, and more. This is where the fun really begins!
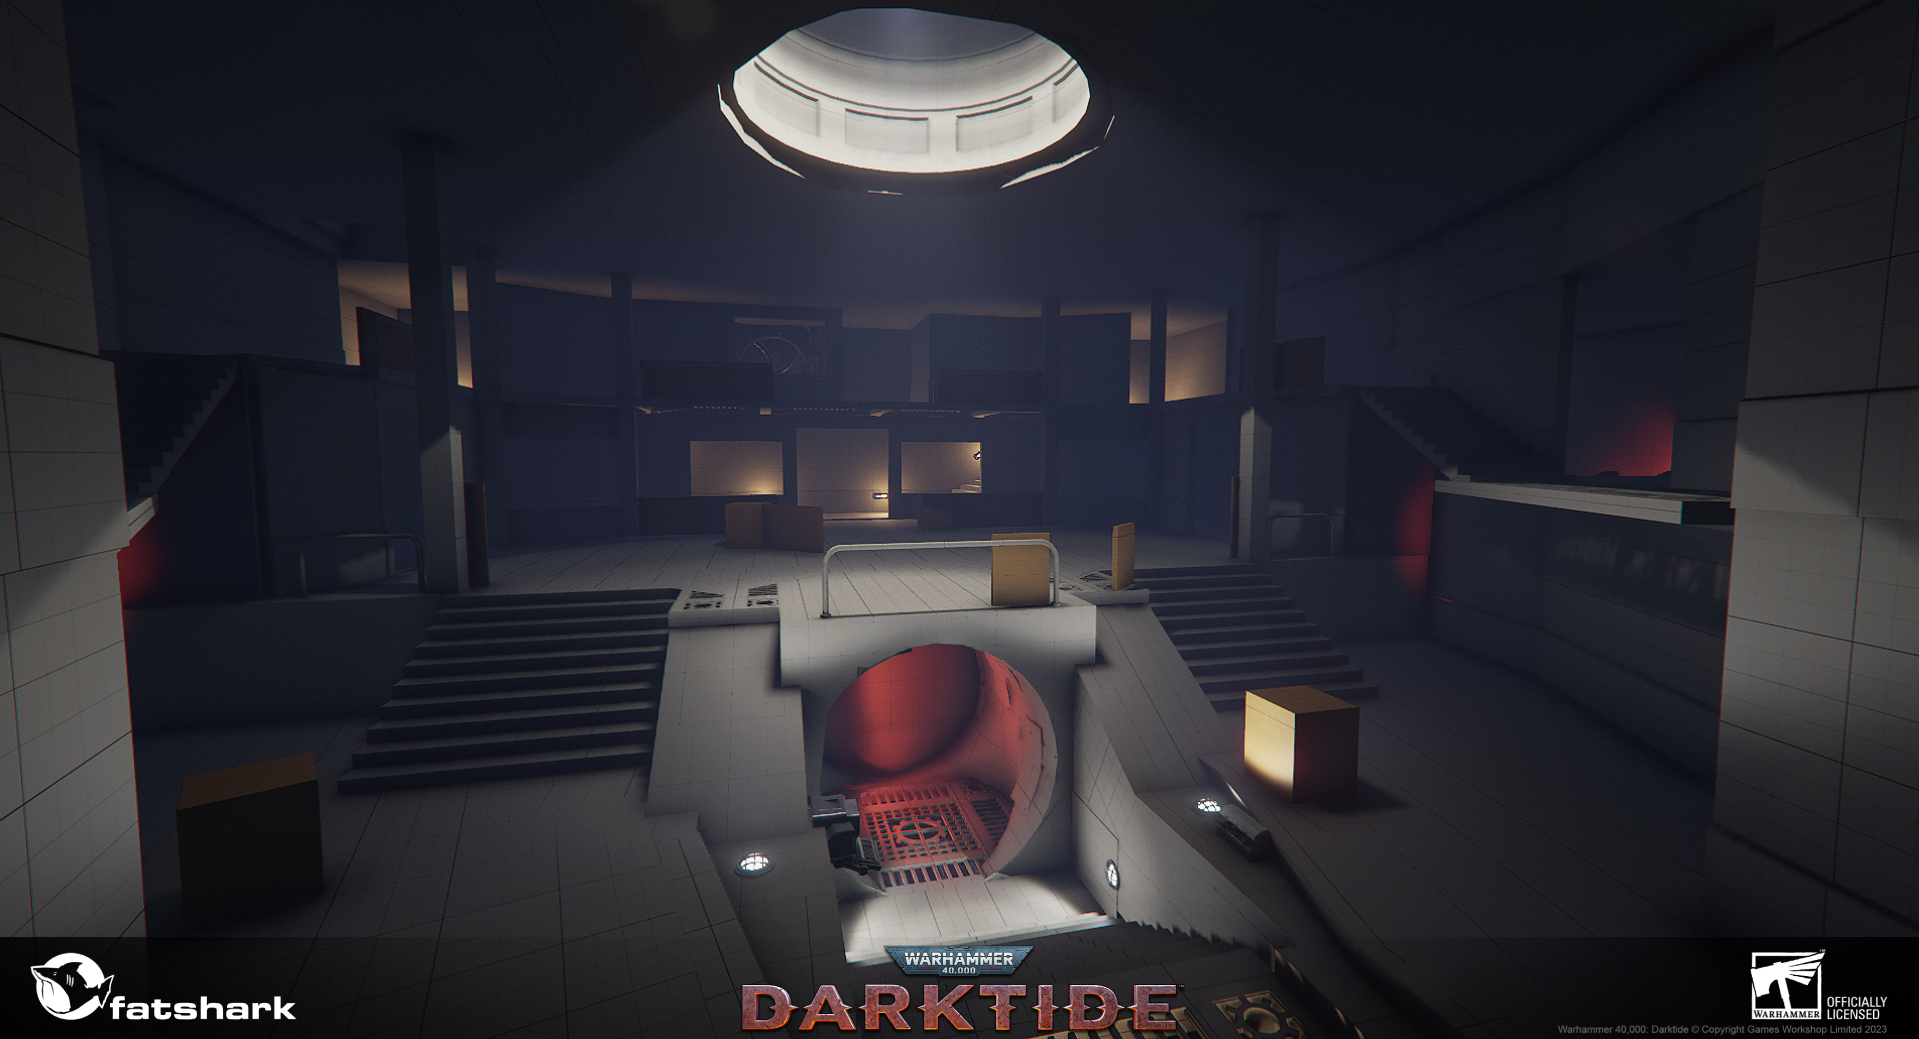
Note: Below you’ll find some early design notes for different chunks within missions. As these are from initial planning, they may not represent the final versions of the levels you play today! But we thought they’d be interesting for players to see.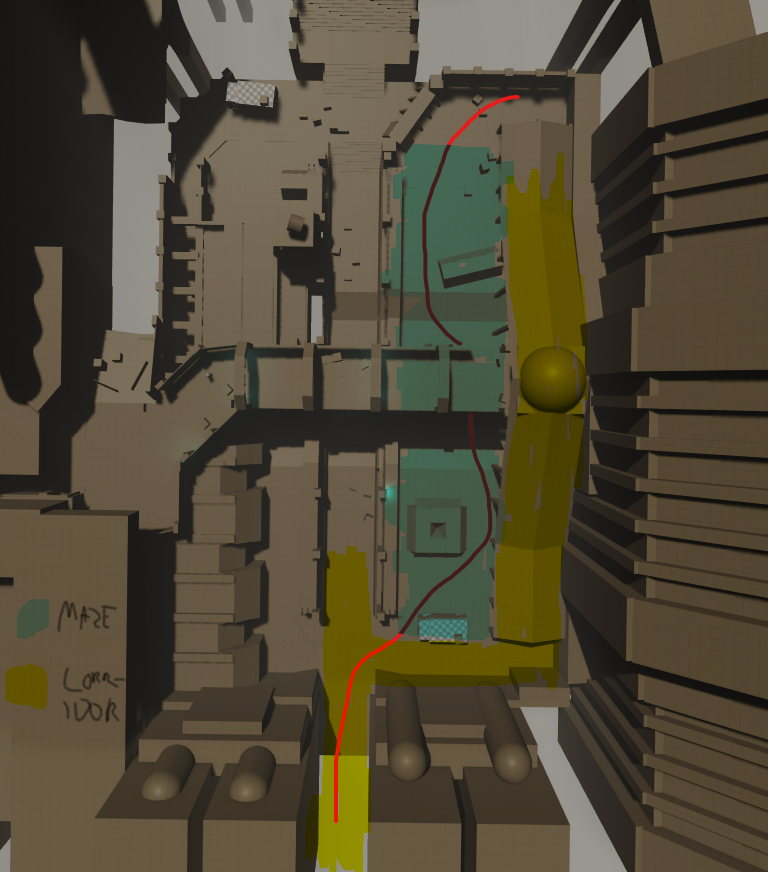 Chasm Logistratum - Chunk 2
 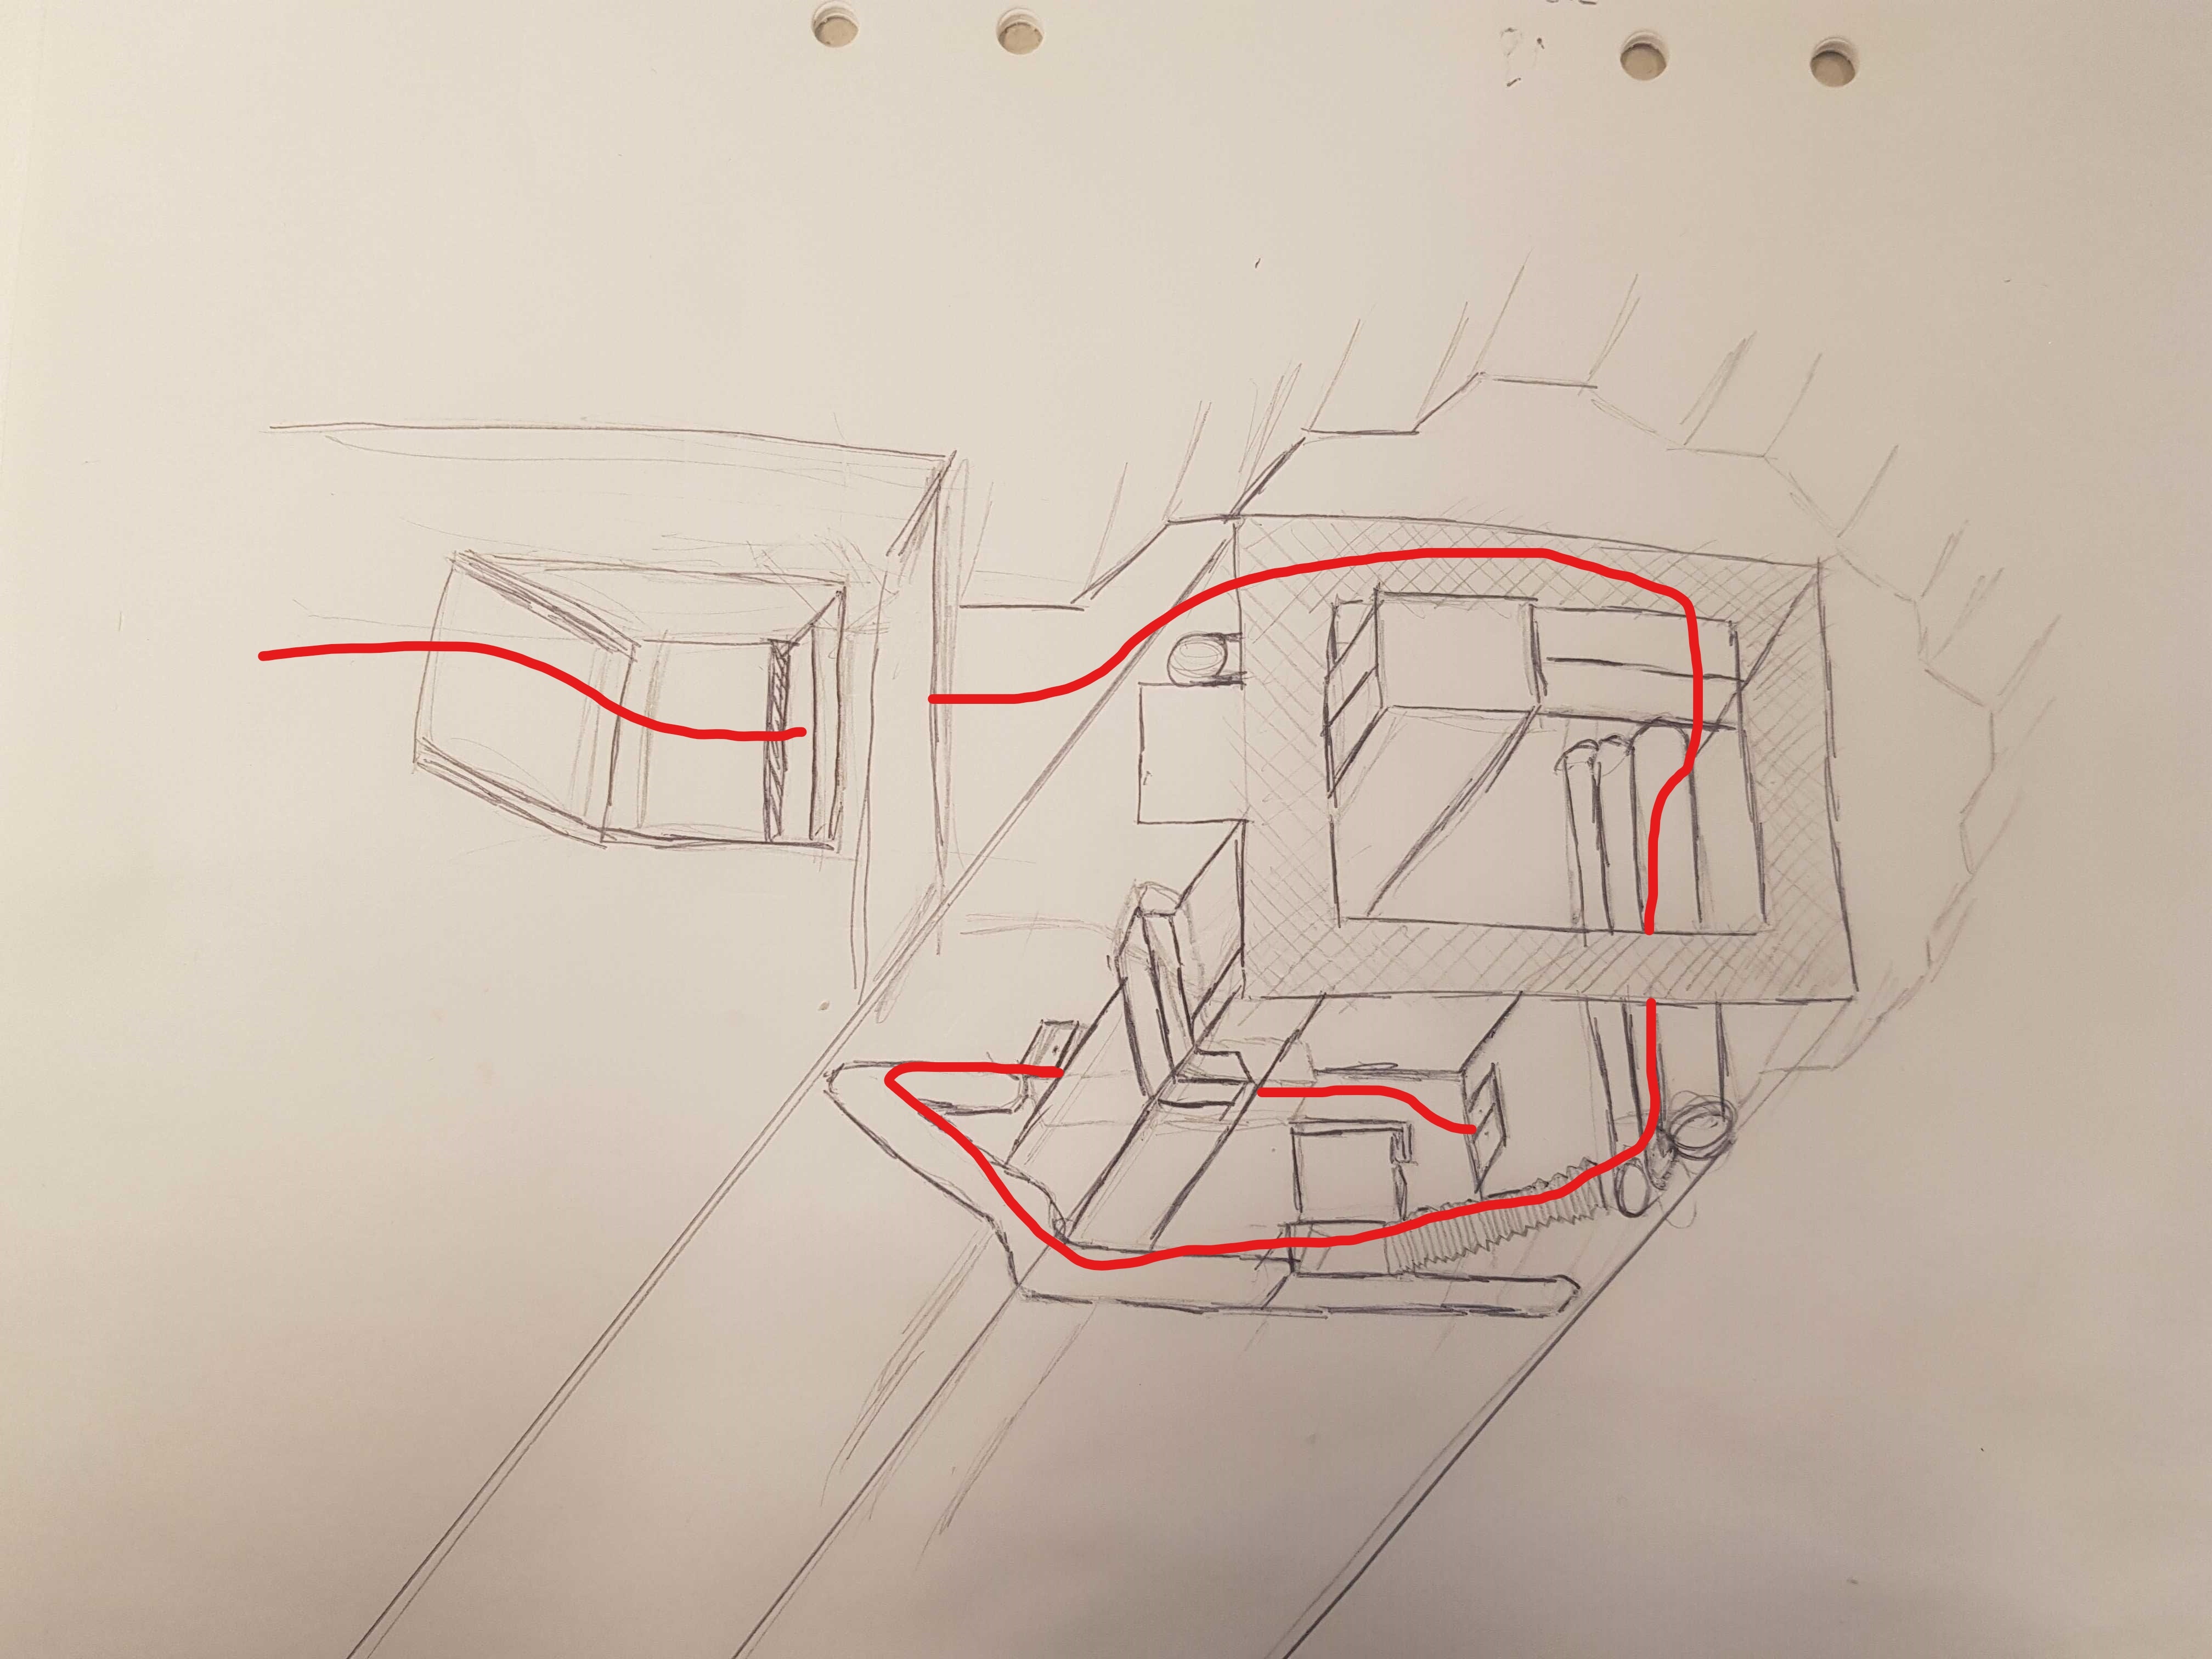 Chasm Logistratum - Chunk 3
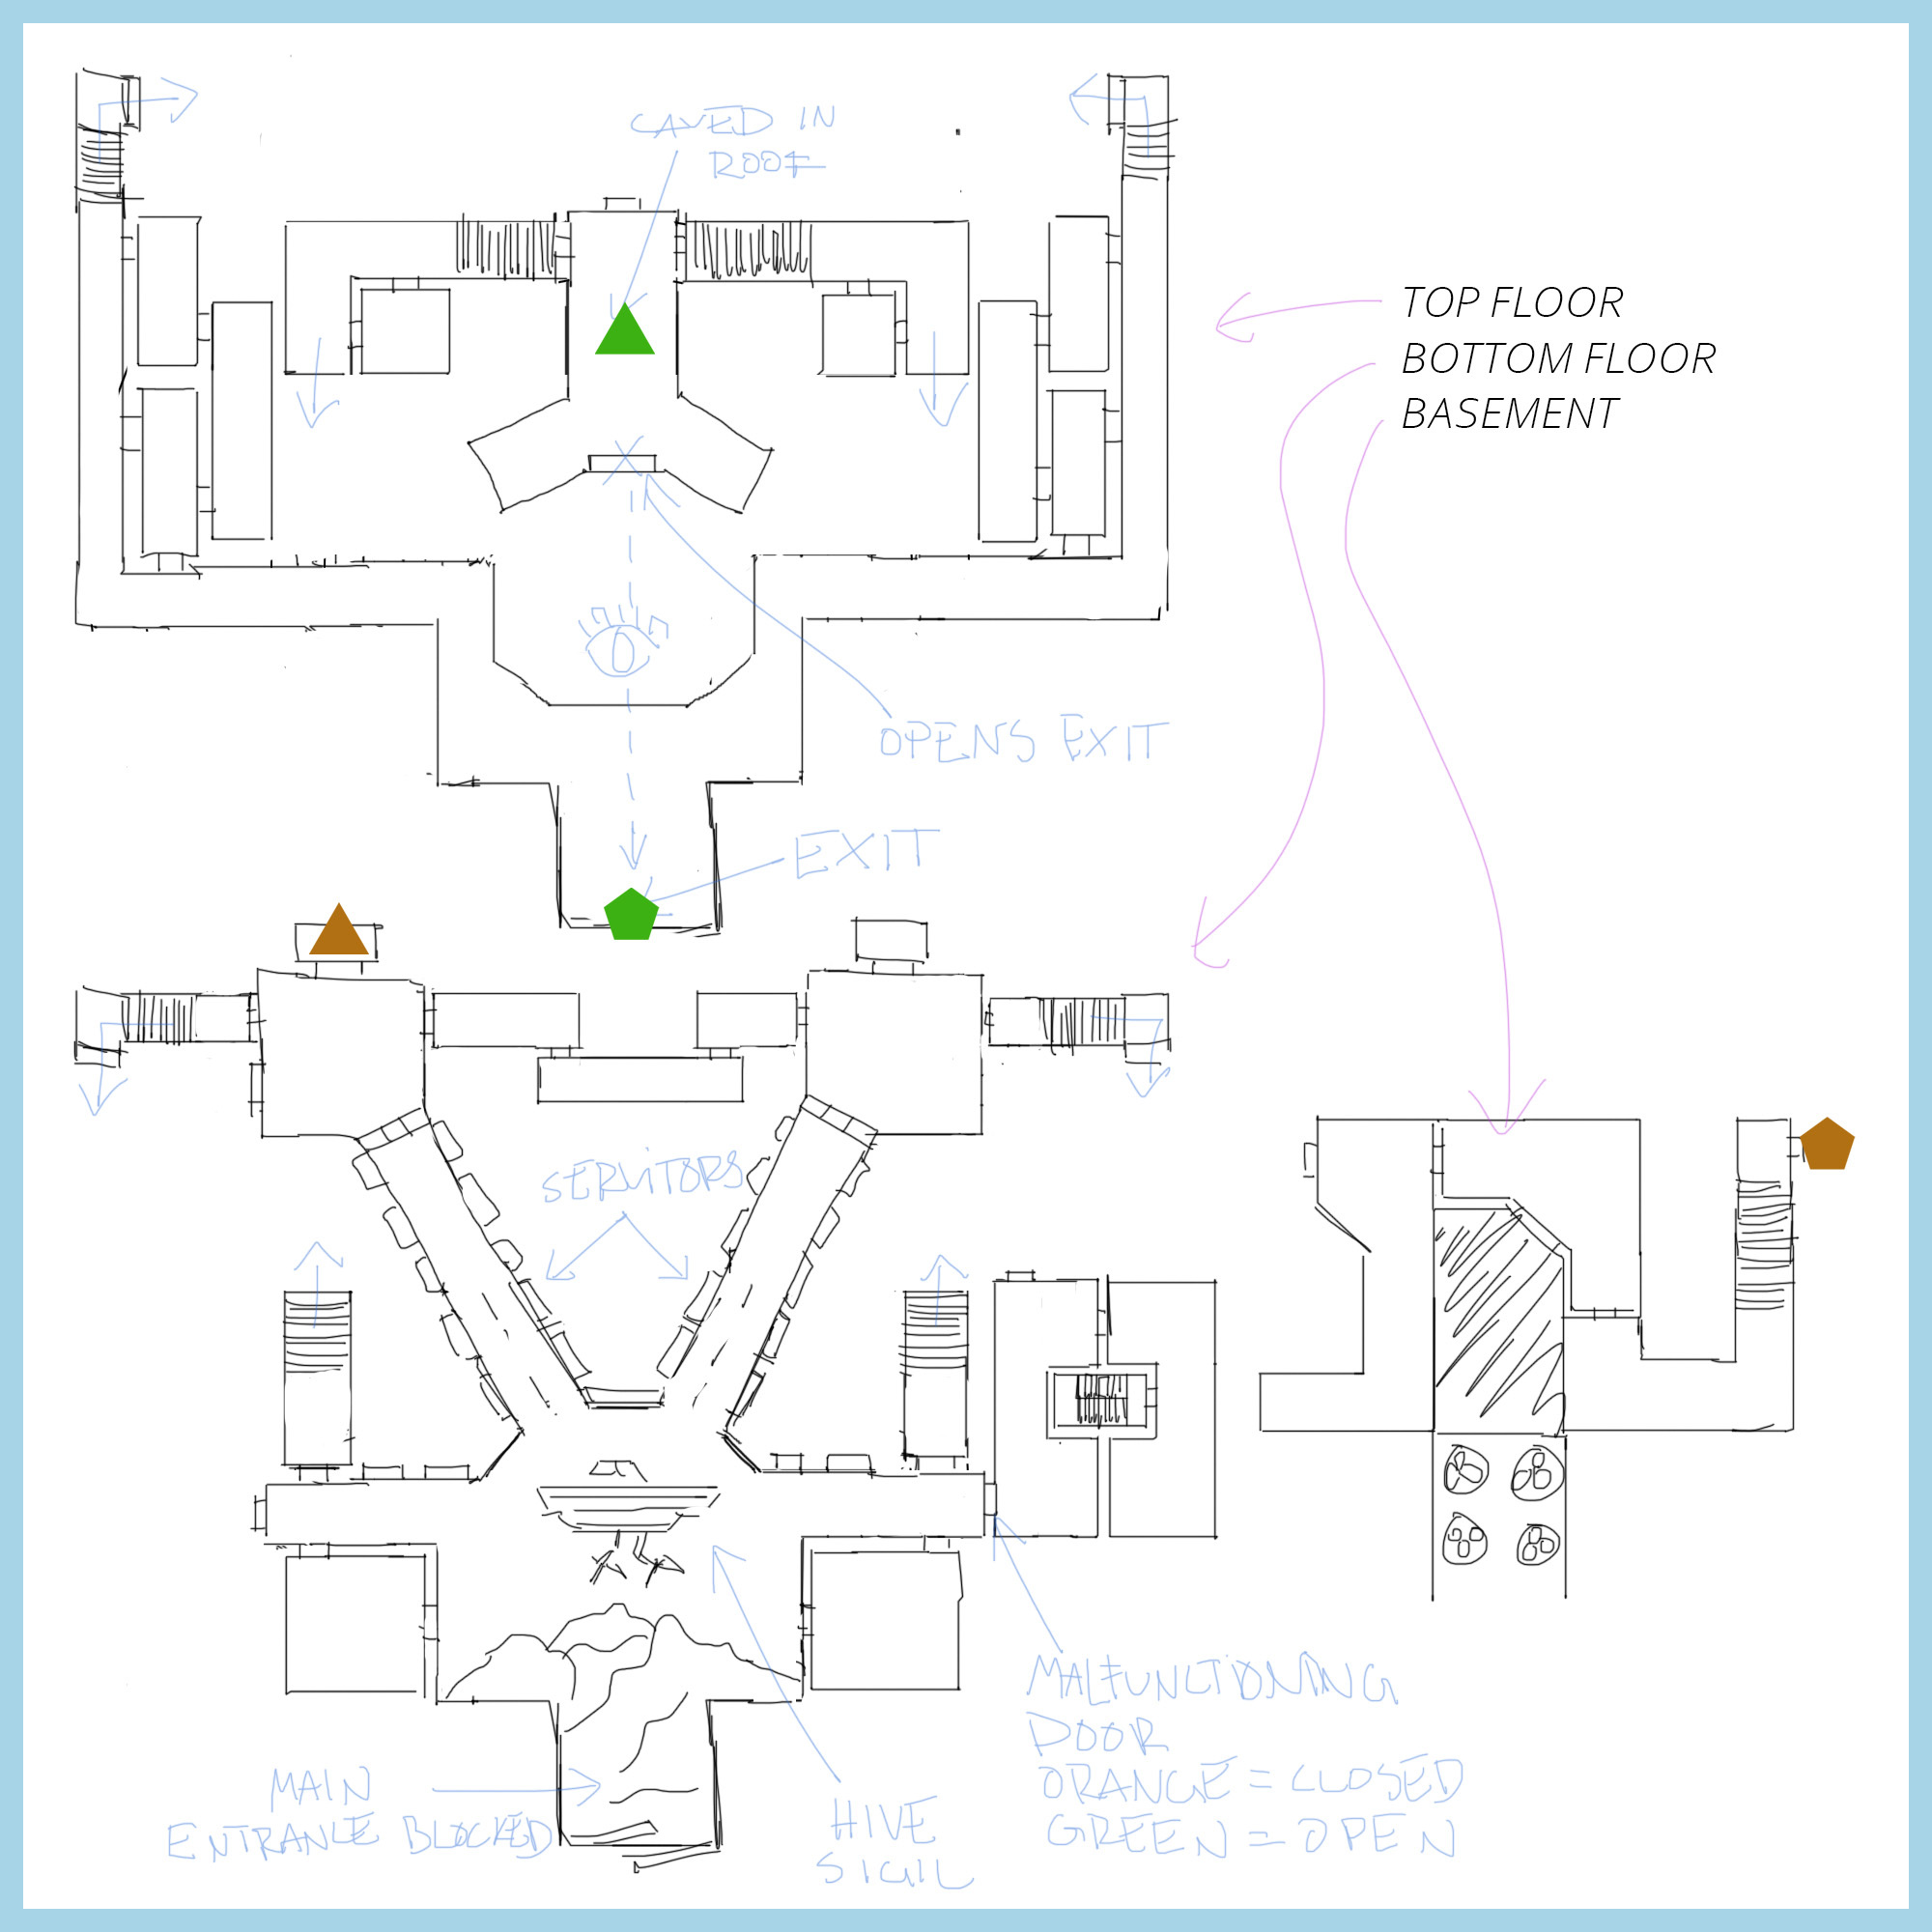 Chunk 1 - Relay Station TRS-150
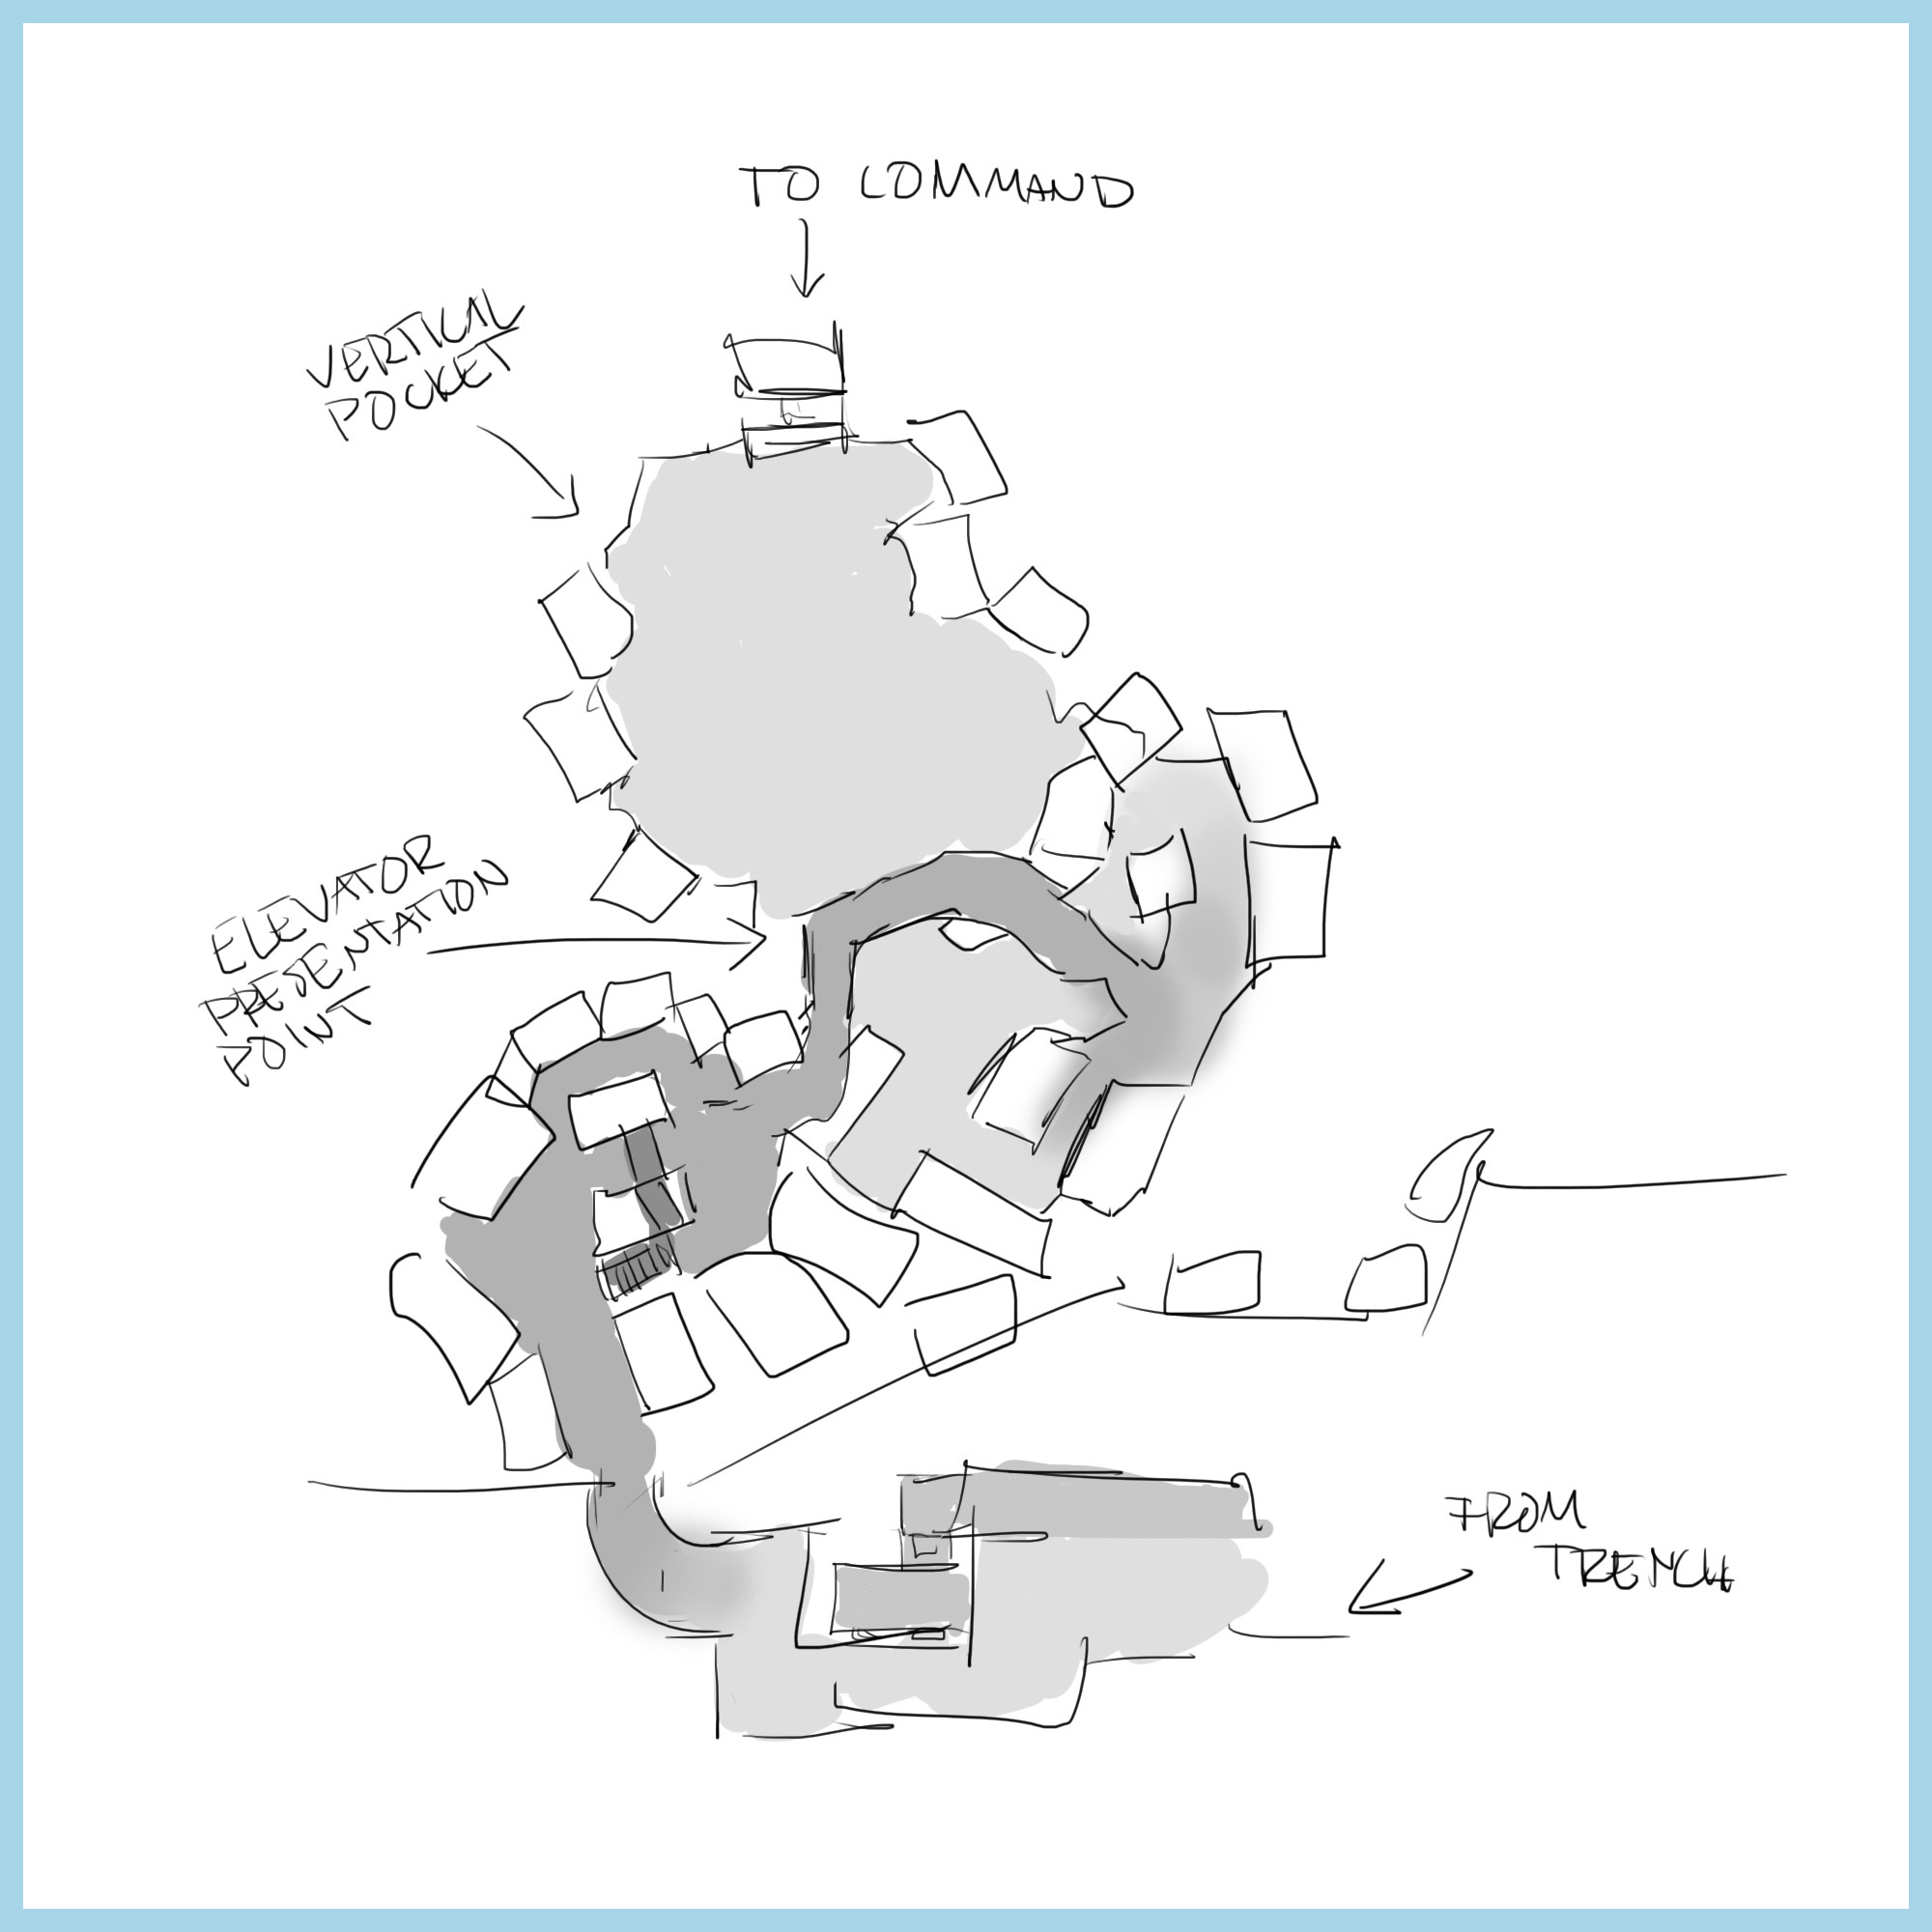 Chunk 4 - Relay Station TRS-150
When we start building a level in our engine, we use very simple geometry, a phase commonly known as gray box, white box, or blockout. This approach allows for quick design iteration until we're satisfied with the experience. Building the base of a level is similar to traditional painting or sculpting – we begin with broad strokes and large shapes to get the scale right and do Warhammer 40,000 justice.
Once the blockout of the mission is in place and everything works as intended, we start playtesting. Initially, team members who are working on the mission test it. This helps us understand how the mission plays out and how the enemies behave. We often iterate a lot during this step, refining areas that don't play as intended. It's much easier and faster to make changes during the blockout phase than after adding the final art.
When we're happy with the basic layout, we add all the logic and smaller details to the mission. This includes pickup spawners, enemy spawners, and climb edges for enemy traversal. We also set up the logic for player characters, such as hang ledges, respawn locations, and health stations. Covers are added for both players and enemies to create engaging combat spaces. At this point, the mission should be fully playable from start to finish with all the necessary elements in place. We then playtest it with a larger group from the team, gather feedback, and iterate as much as possible.
The events in missions typically require the most time and iteration to perfect. These segments are complex because they must deliver both engaging combat encounters and clear narrative progression. Ensuring that players grasp the storyline amid intense combat is a significant challenge that demands the collective expertise of the entire team.
Moreover, these events are particularly challenging to block out successfully. They heavily rely on integrating various mission elements—such as art, lighting, effects, and voiceover—to effectively convey the unfolding narrative.
 Chasm Logistratum Blockout
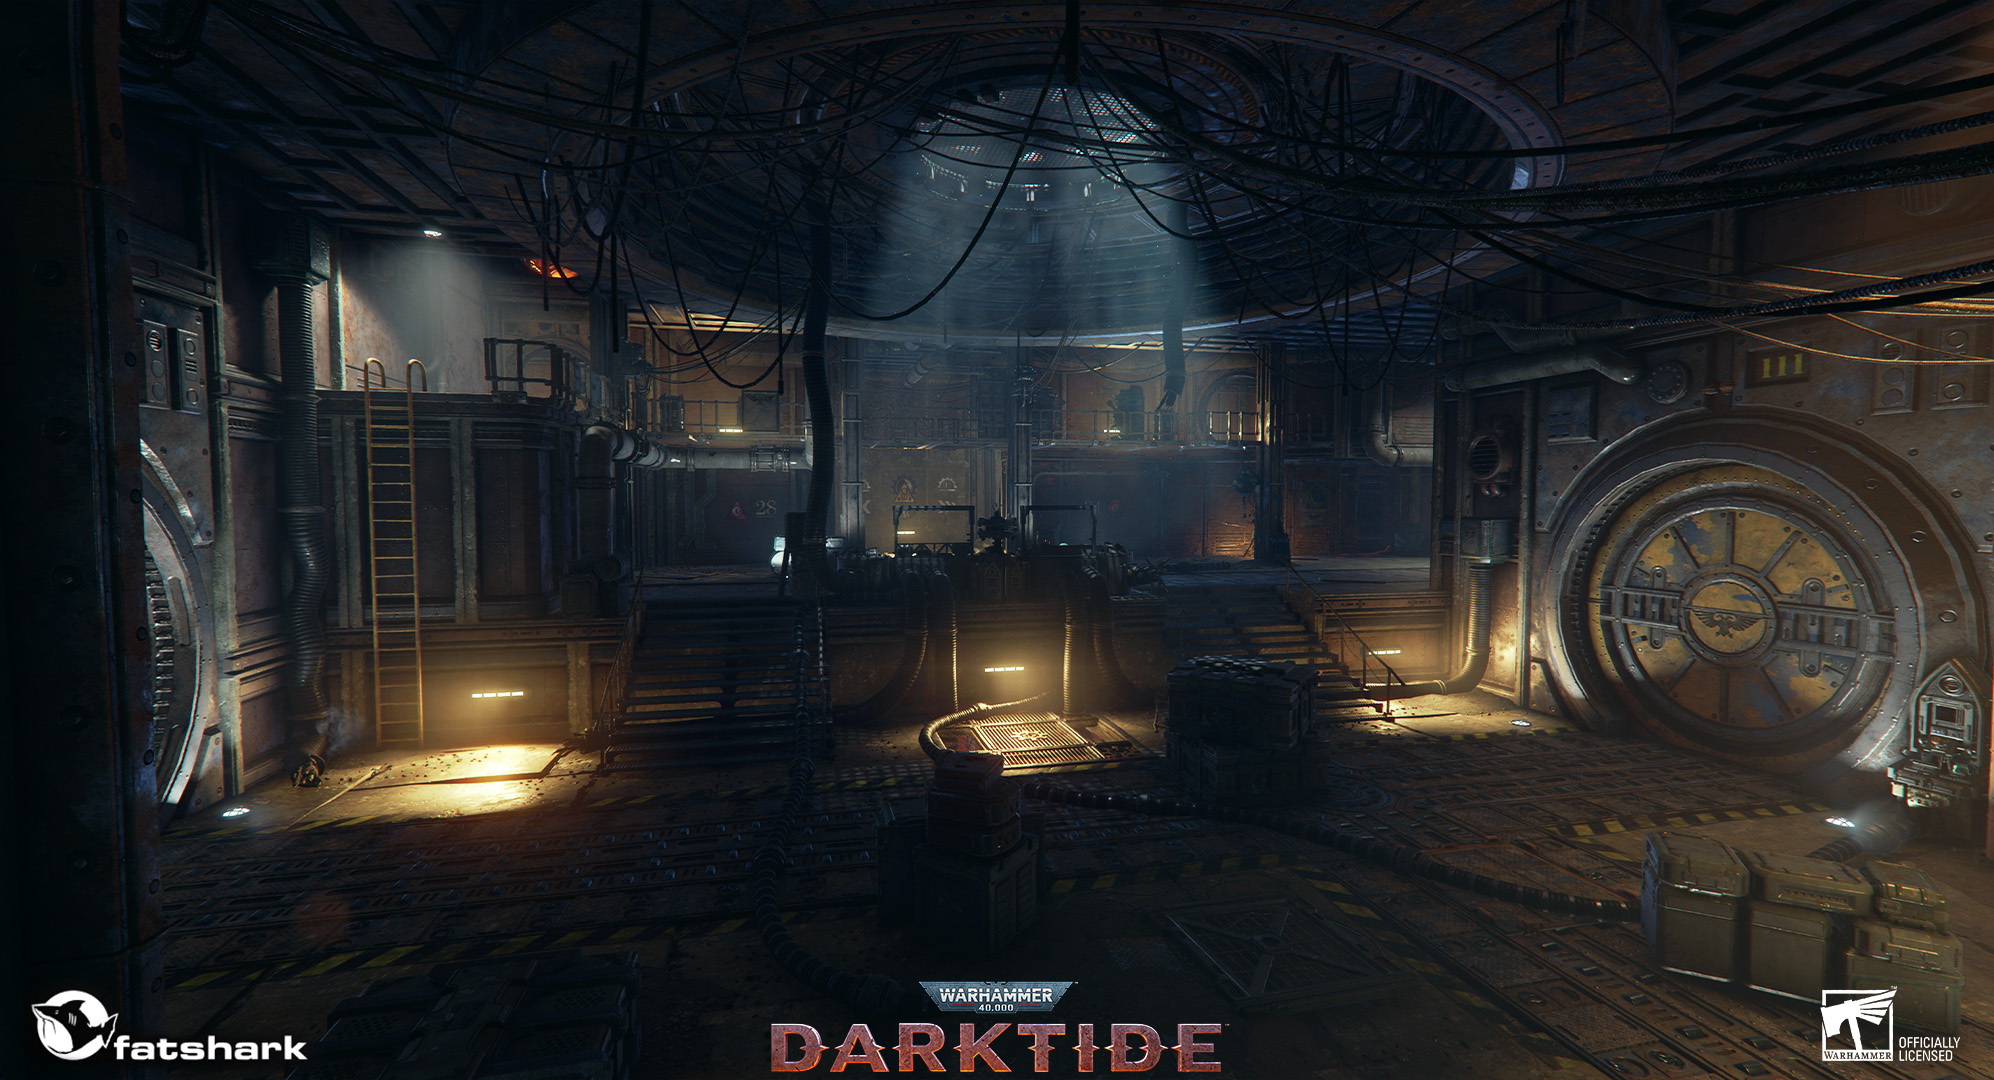 Chasm Logistratum Final
 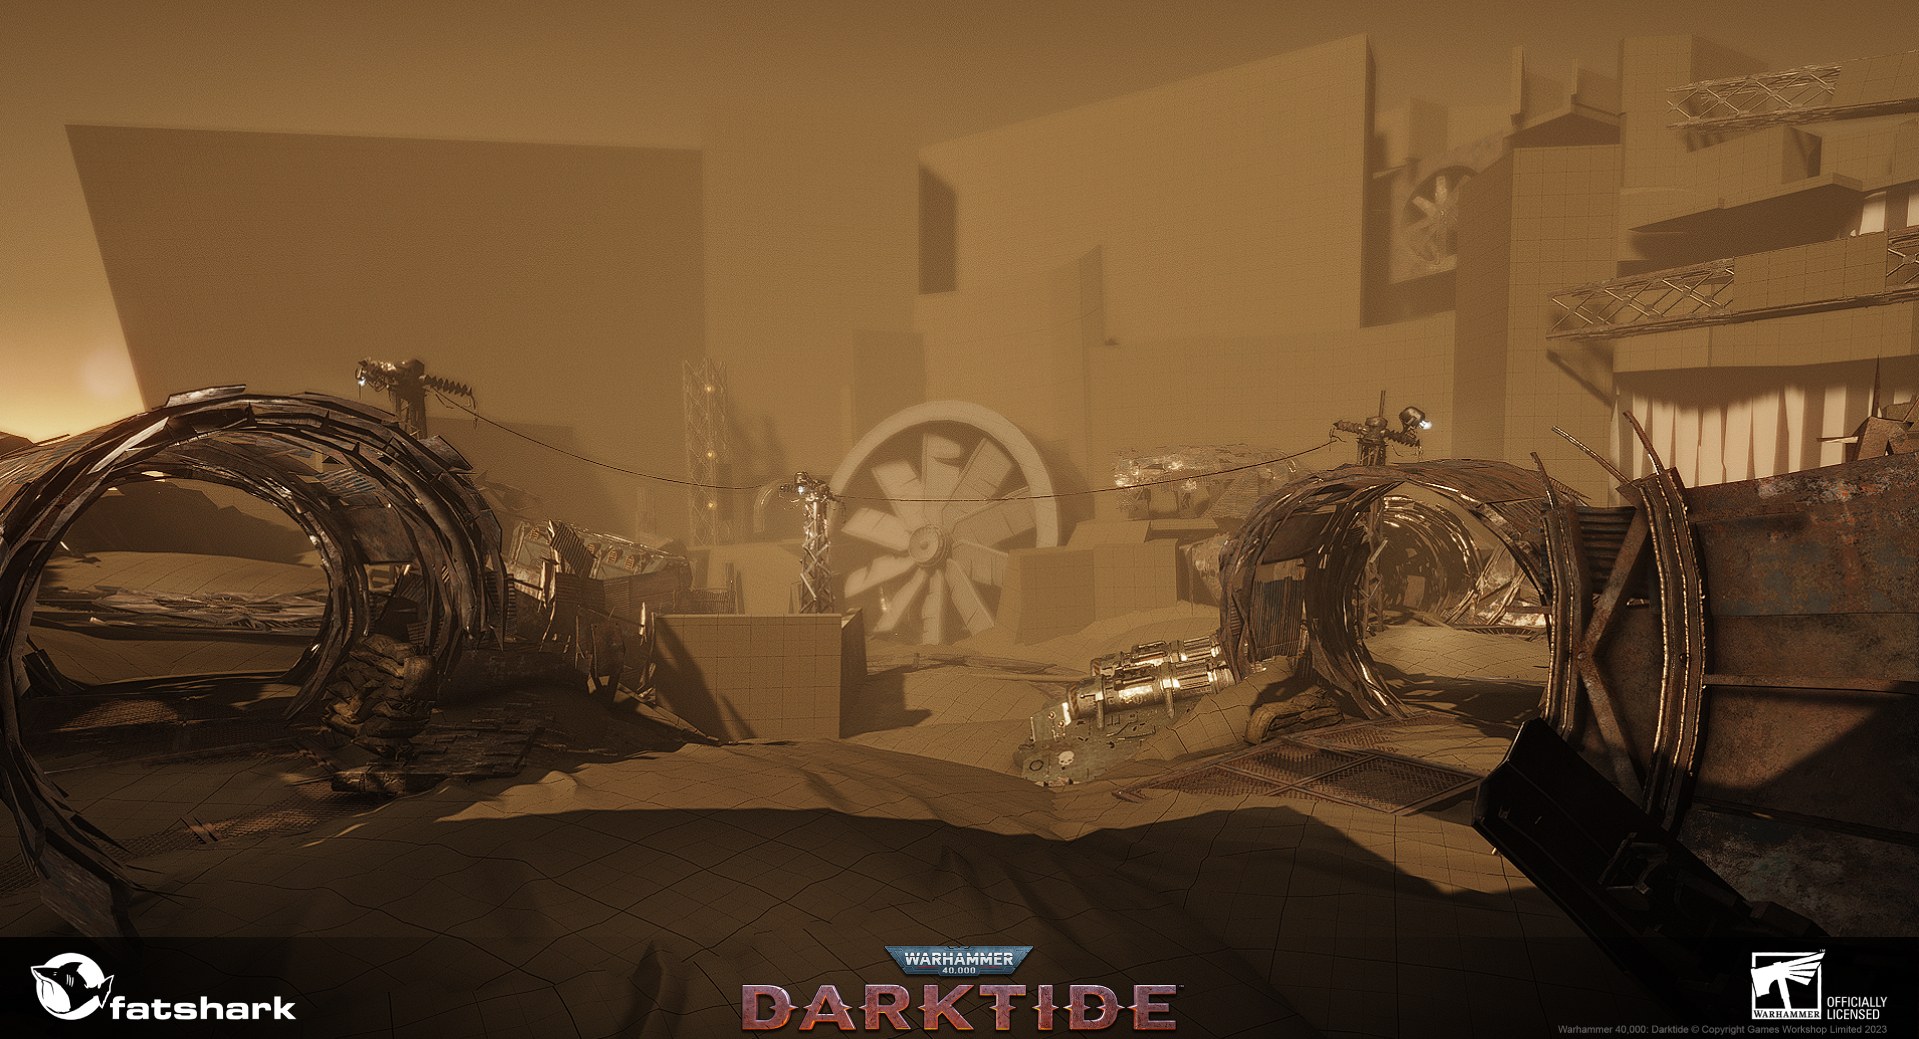 Relay Station TRS-150 Blockout
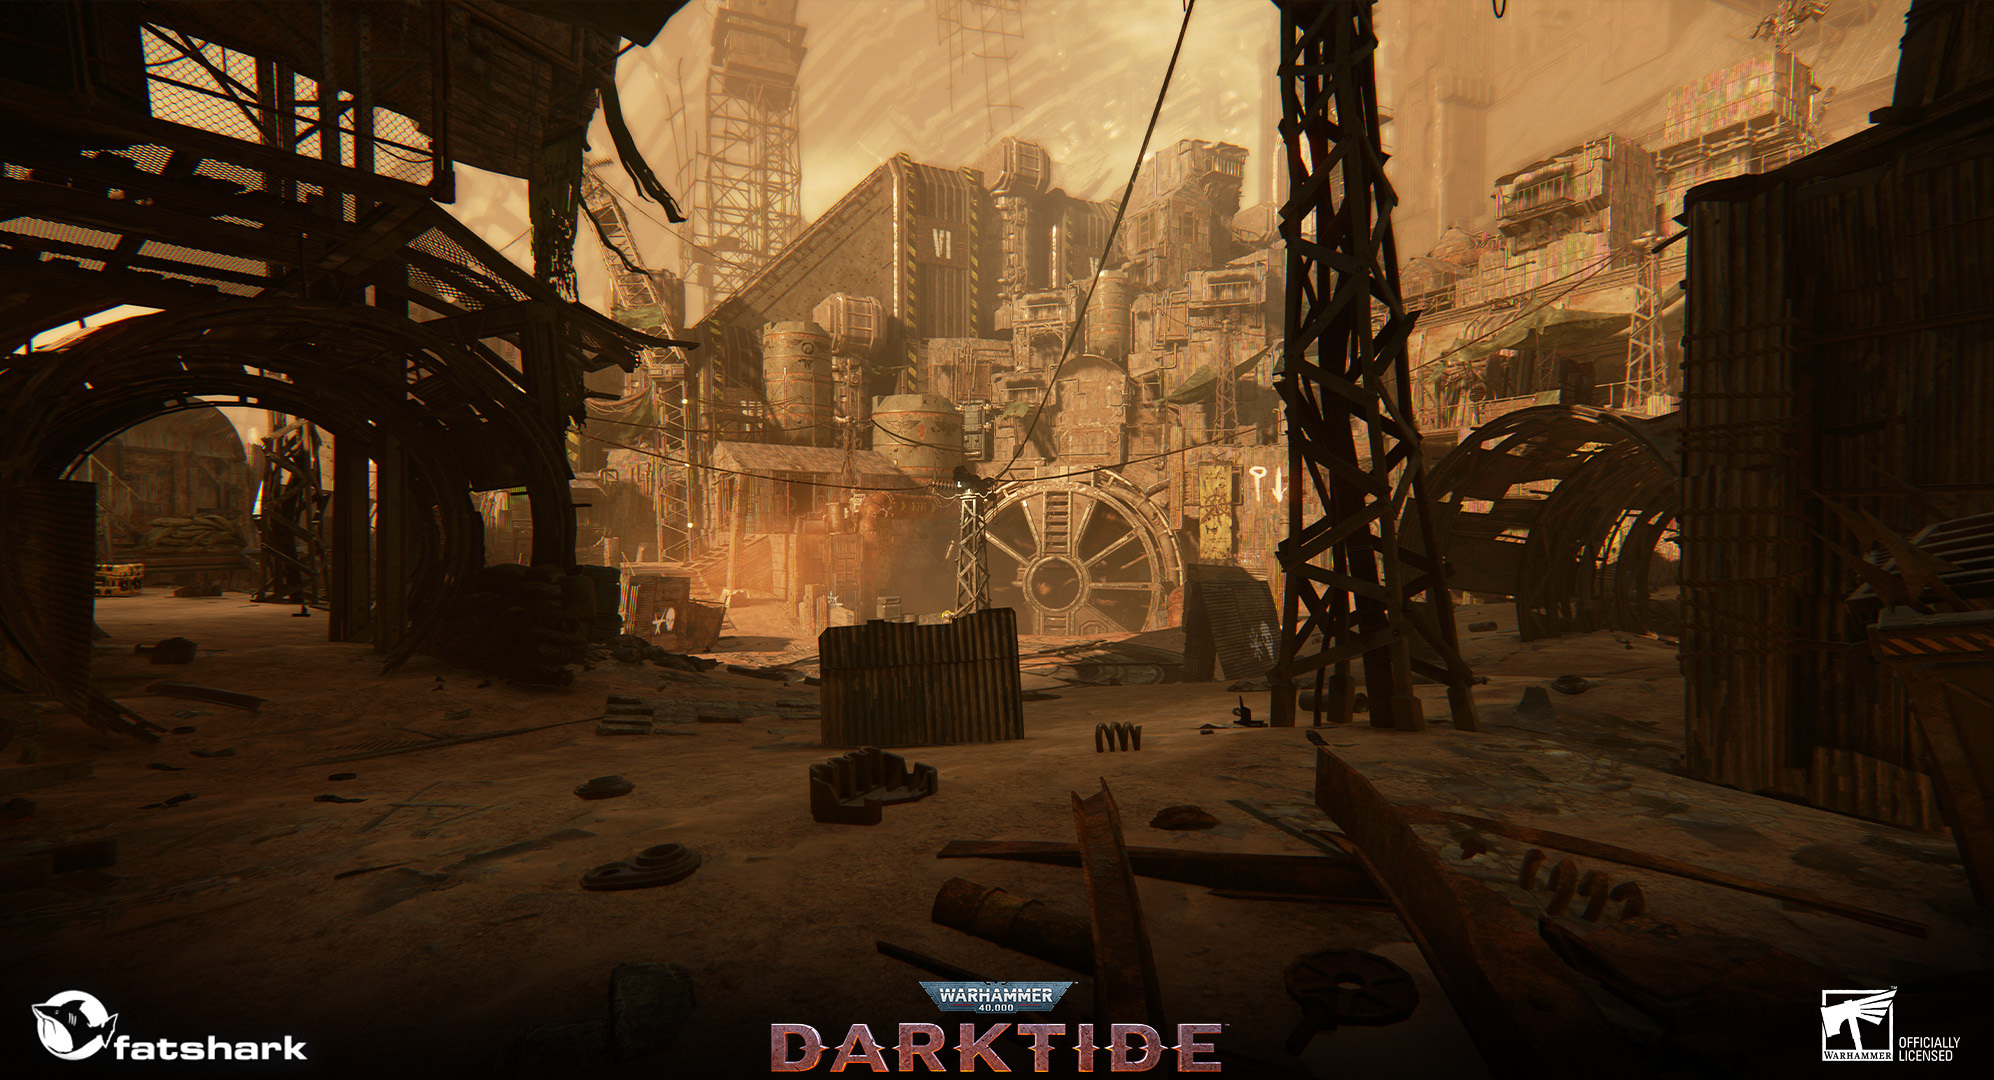 Relay Station TRS-150 Final
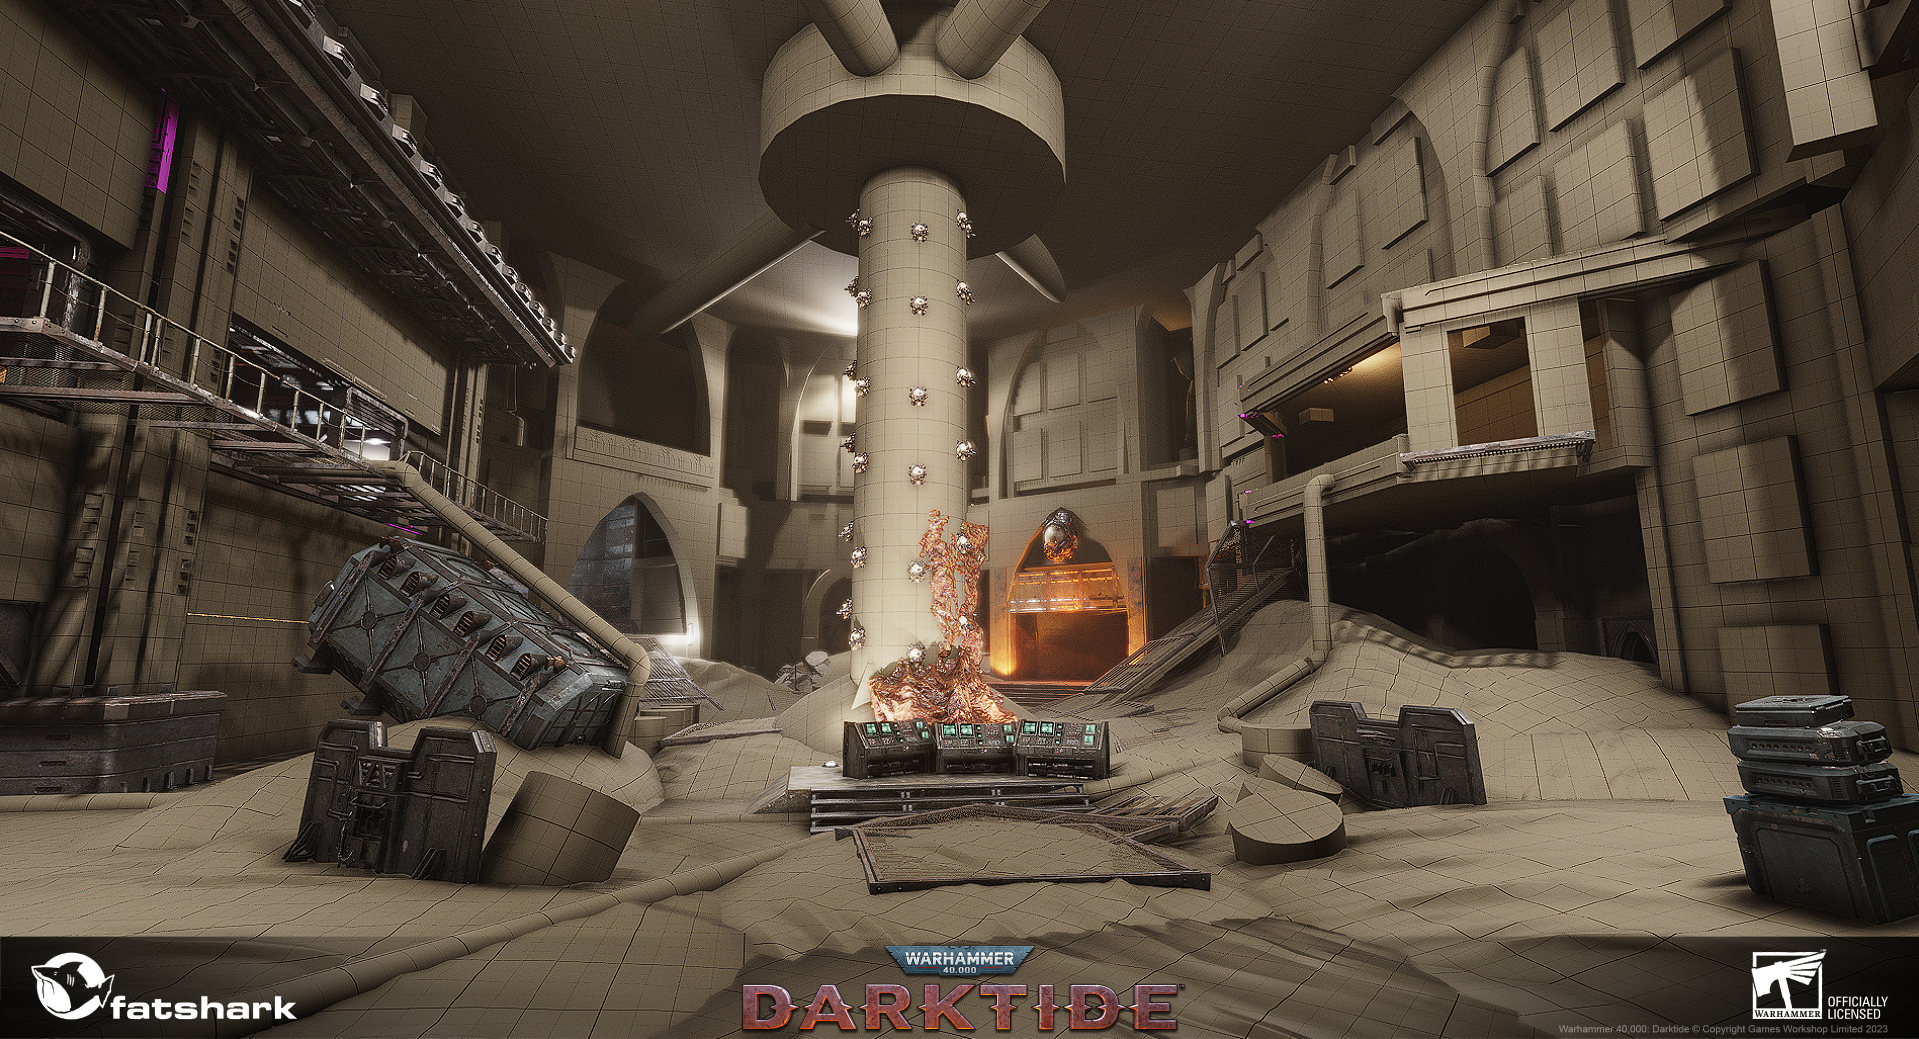 Excise Vault Spireside-13 Blockout
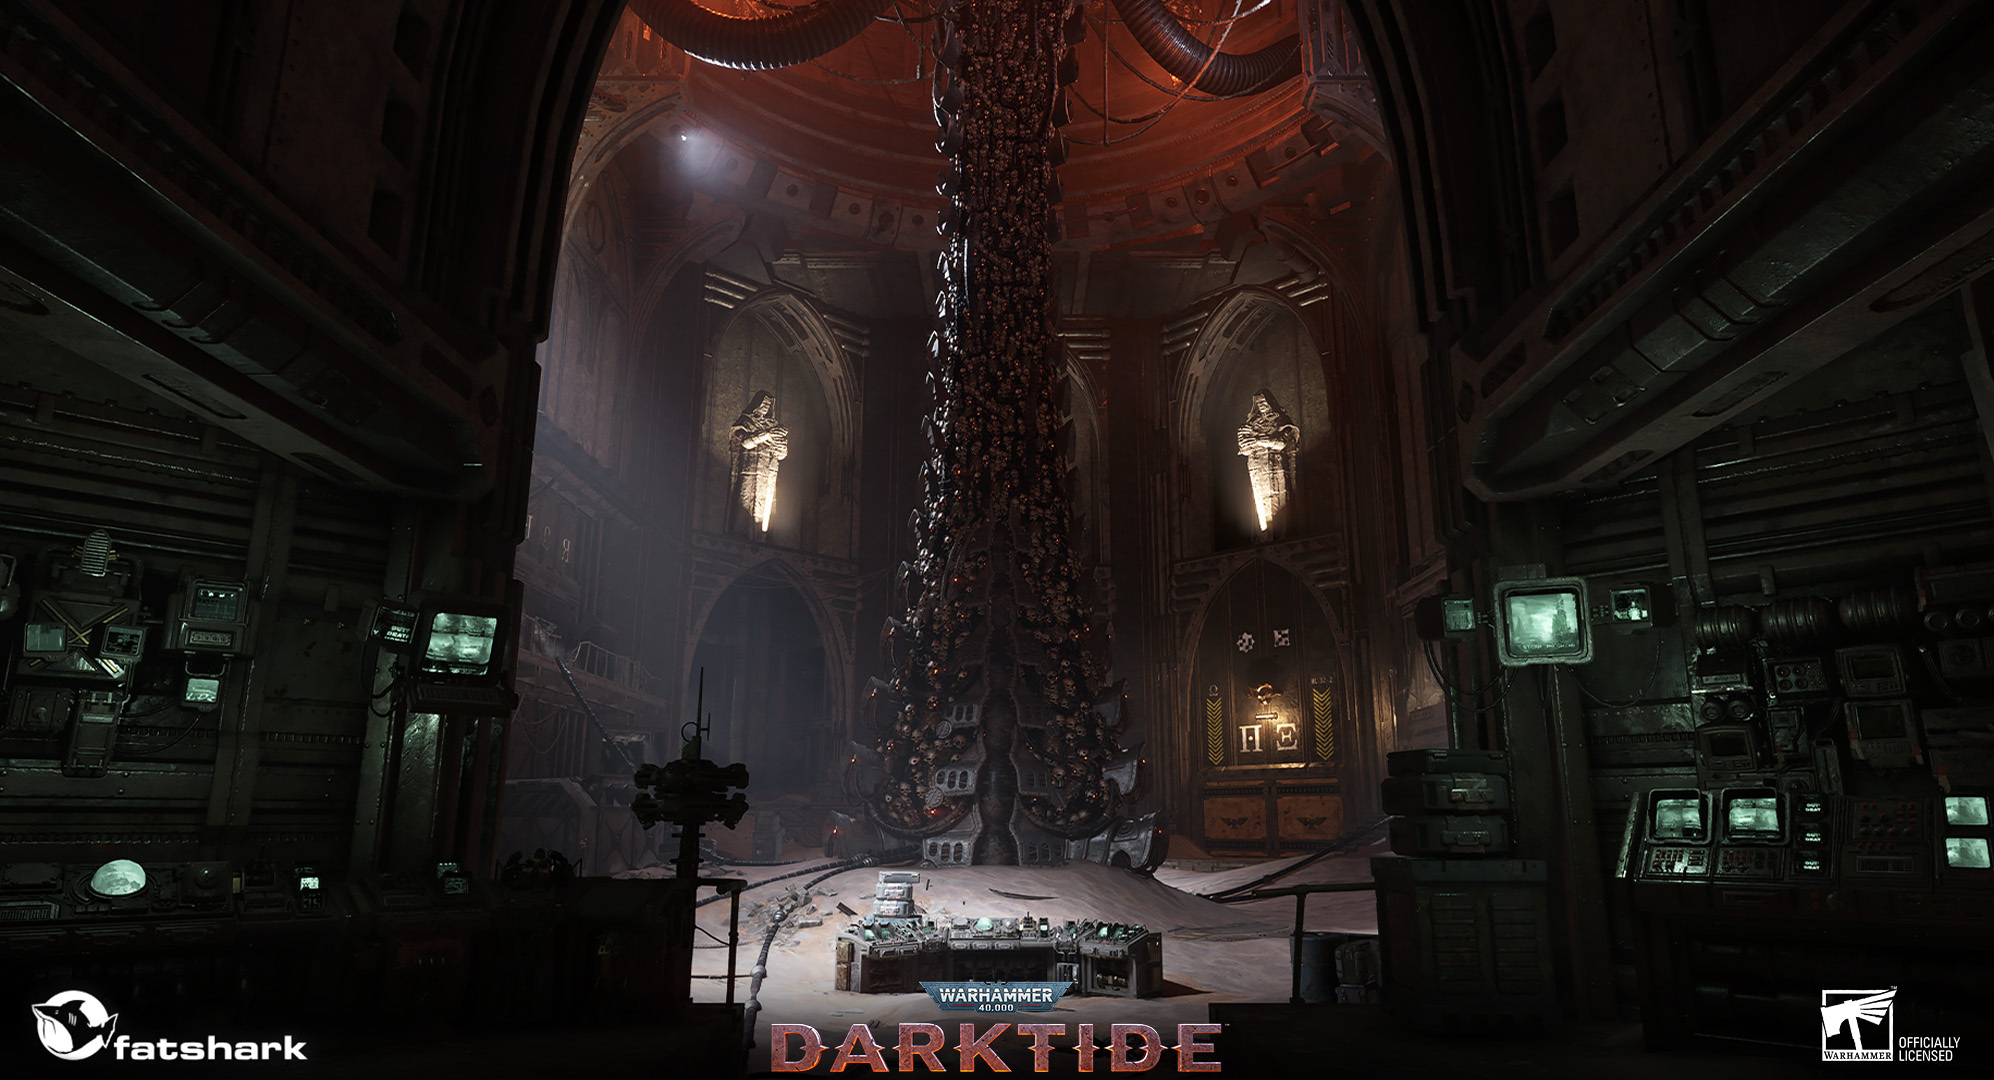 Excise Vault Spireside-13 Final
We take the events as far as we can during block out and pray to the game developer gods that it will all work out in the end, worst case we will have to go back to the drawing board and come up with some other solution, and sometimes this might force us into rethinking the narrative of the mission completely which is something we try to avoid as much as possible but it did happen a few times during the development of Darktide.
This is the end of Part 1 to Level Design for Darktide. We’d like to discuss it in more detail in another 101 dev blog! Let us know if you’re interested.
Cinematics
Hi everyone, I’m Tim. I worked with cinematics during the development of Darktide. I’m here to write a small rundown of how we make cinematics in Darktide!
Of course, every cutscene starts with a bunch of planning, but I’ll skip that part for the sake of brevity.
After planning, the first step we do in-engine is prototyping; we make a really ugly prototype to test out how things flow and if the script fits our planned shots. Once we have a prototype we feel okay with, we iterate on it. We add VFX, animations, character art, finetune the cameras and add audio (though not necessarily in that order).
Here’s an early prototype we made for the first cutscene in the Prologue (it’s very WIP to show you what the first iteration looks like for cinematics):
https://youtu.be/TOQM-bxNE_c Since Darktide was still in the middle of being developed when creating this prototype, some things were gradually added as they were finished for other parts of the game. For example, we didn’t have the unit for the Poxburster until a bit further into production, so we used a WIP Poxwalker as a stand-in for this first prototype.
We use a visual programming system, called Flow, for most of the VFX and audio triggers. Essentially, we set up a sequence of animations and position keys, with some pretty simple scripting to trigger VFX and audio throughout a cutscene.
Here’s a quick example of what a part of the first cutscene in the prologue looks like within our editor (see the screenshot) as well as outside the editor (see the video). (Note: This prototype is without the VFX we added later).
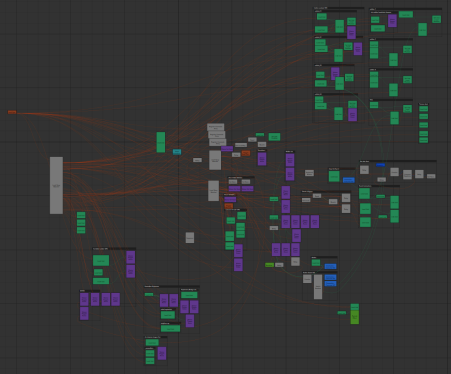 First Cutscene in Prologue in our Flow Editorhttps://youtu.be/CCuCTf6p4CY
 This is the end of Part 1 to Cinematics for Darktide. We’d like to discuss more details about the planning that goes into cinematics, and / or to share more examples.
OK! That’s the end of our first Darktide 101 dev blog. Let us know what you think and if you’d like to see more behind the scenes stuff like this. We’d be happy to share other similar topics with everyone. If you have any further questions for the teams working on level design and cinematics regarding what it’s like to develop, let us know in the comments.
Until next time!