 written by Fenni Johansson, Hanna Johansson, and Nicolas Lennman
 Hi! My name is Fenni and I’m an Art Producer for Stellaris.
Today, I will talk a bit about our art processes and give you a little behind-the-scenes look at how our amazing team of artists worked when creating the Aquatics species!
Exploring the narrative When creating a new species, we first start by exploring the theme, story and narrative of the species. When creating a character inspired by an existing animal, we also first explore why this animal looks the way it does and what specific characteristics we can identify. How did the animal evolve to look like this? How has the environment it lives in shaped it’s appearance and behaviour? This helps us understand what elements and why something looks and feels the way it does, and we can use it as inspiration for creating an alien species.
For example, we can start by exploring the deep sea as a source of inspiration. Our team of artists start by looking at what common identifiers can be found in deep sea creatures, and what emotions they convey. This helps us create a strong narrative. We always explore several different narratives and sources of inspiration, and we use these to create unique characters.
Below is an example of one of these narrative explorations, when our artists explored the deep sea:
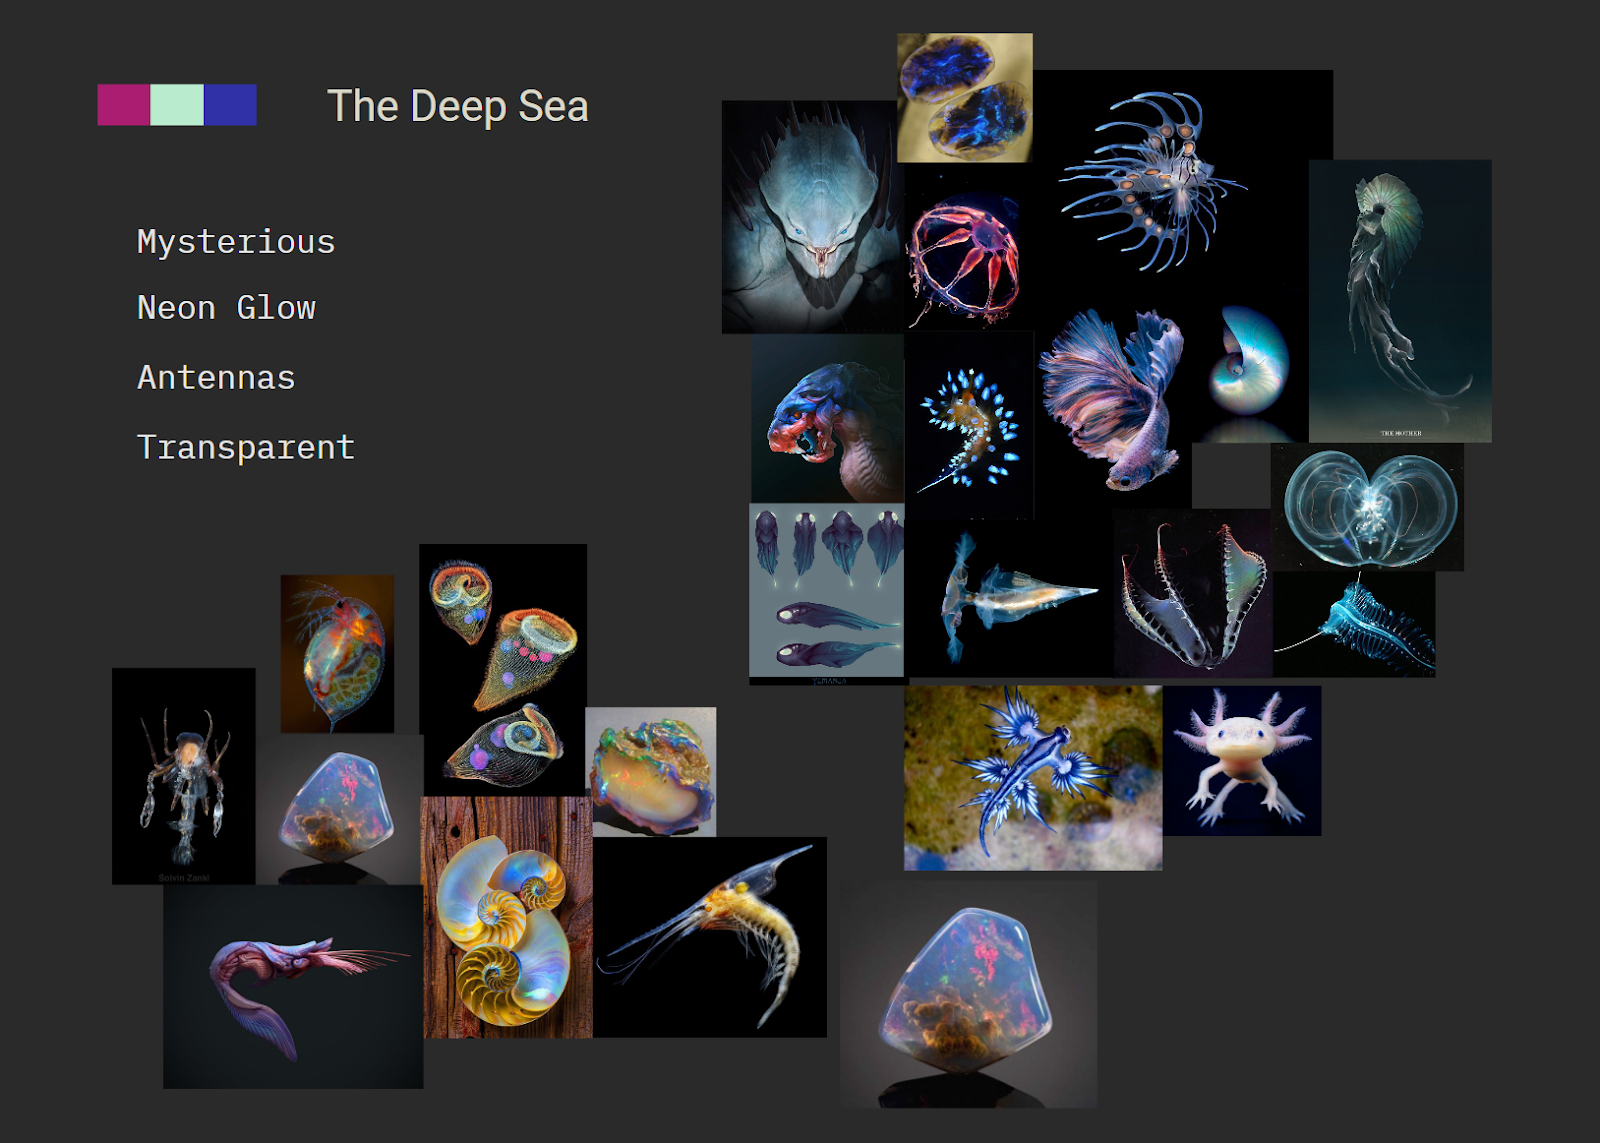 Here our amazing artists defined some identifiers and shared visuals between deep sea creatures, and what emotions they convey. This helps us understand how we can create unique species that also clearly tells the story of a "deep sea dweller".
After identifying these kinds of themes, materials, and narratives, our team uses it to create individual characters.
Telling a story with visuals While we always make sure to stay true to the overall theme of the species, we also focus on making sure each character is unique and tells their own story, conveying a range of different emotions using their visual language. Small changes in a character's design, shape, silhouette can help convey completely different emotions and characteristics. As an example of how we explore how positions, silhouettes and shapes convey different emotions, let's have a look at the exploration process for creating one of our new aliens!
This is an exploration of an alien which was based on crustaceans:
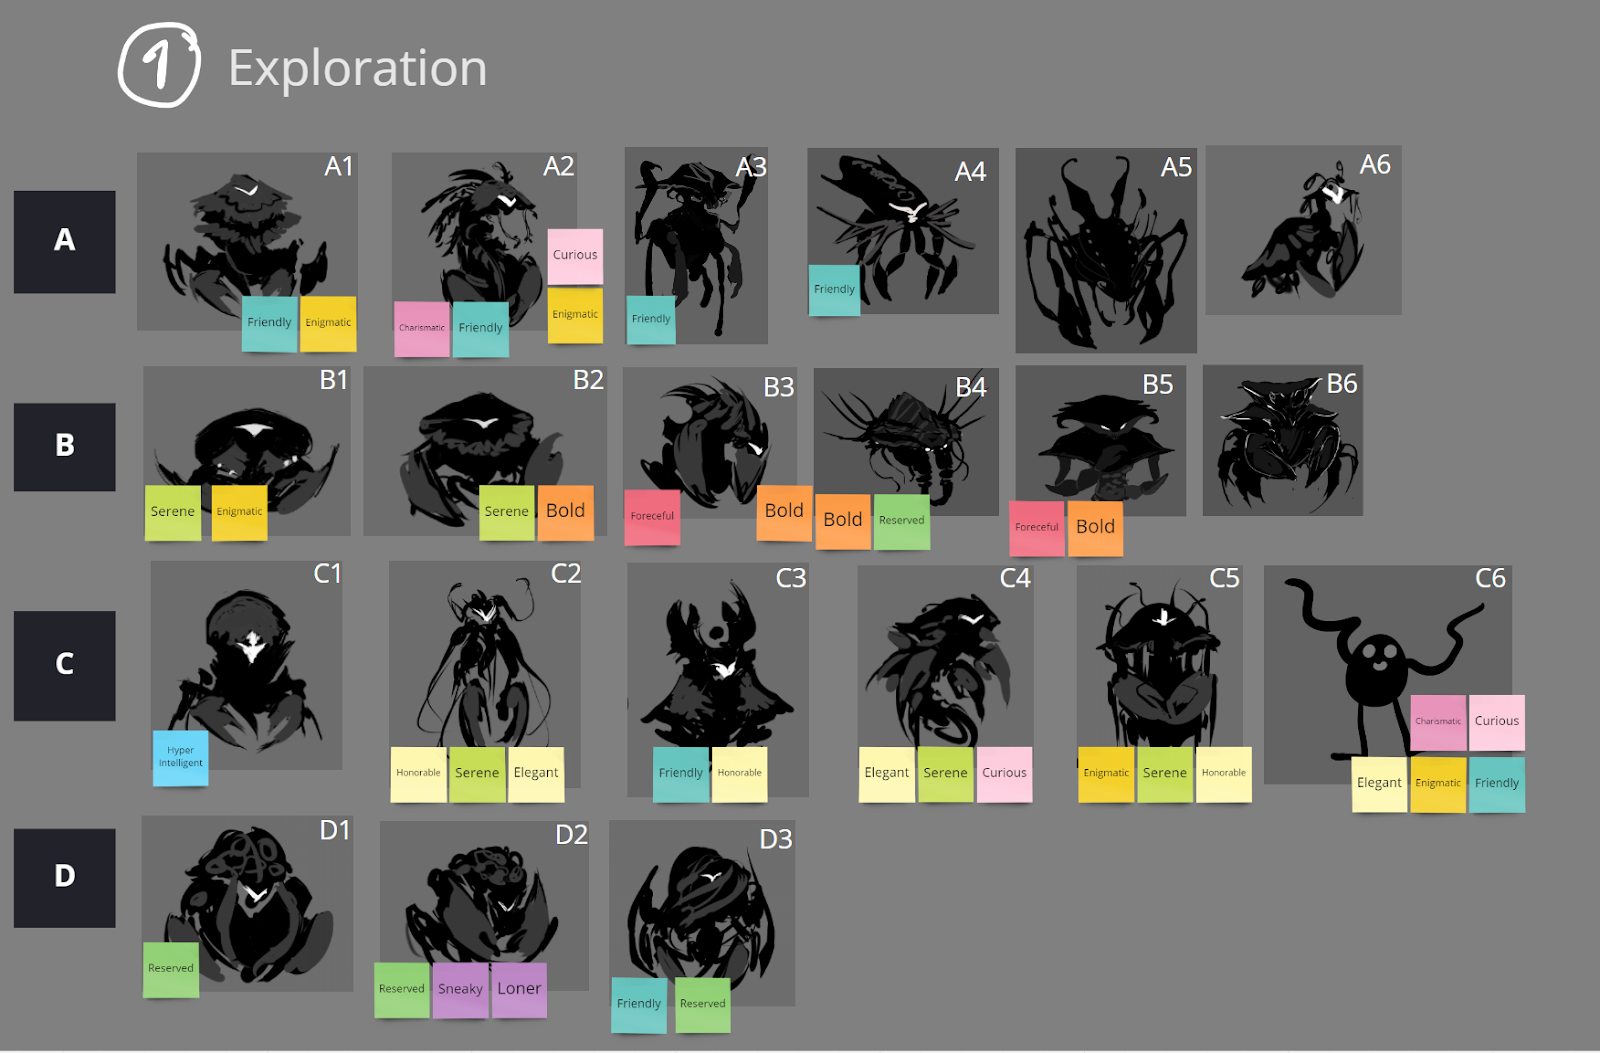 Made by art director Frida Eriksson and artist Emma Jonsson
As you can see, the artists explored several different uses of poses and silhouettes to convey a range of emotions. This is important to explore at the beginning of the species creation process, to make sure we create a cohesive visual language that’s in line with the emotion and story we want the character to convey.
After our artists have settled on a narrative and direction for a species, they start sketching up some more defined concepts.
Concepting During the concepting phase, the artists explore a lot of different directions before settling on a design that conveys the right visuals and story. Let’s look at another example!
Below we have some detailed explorations of a squid-like species.
Like mentioned before, we first decide what narrative and emotions we base our characters on. For our Squidbert here, our artists wanted the species to specifically convey three different emotions; Enigmatic, Friendly and Hyper-intelligent.
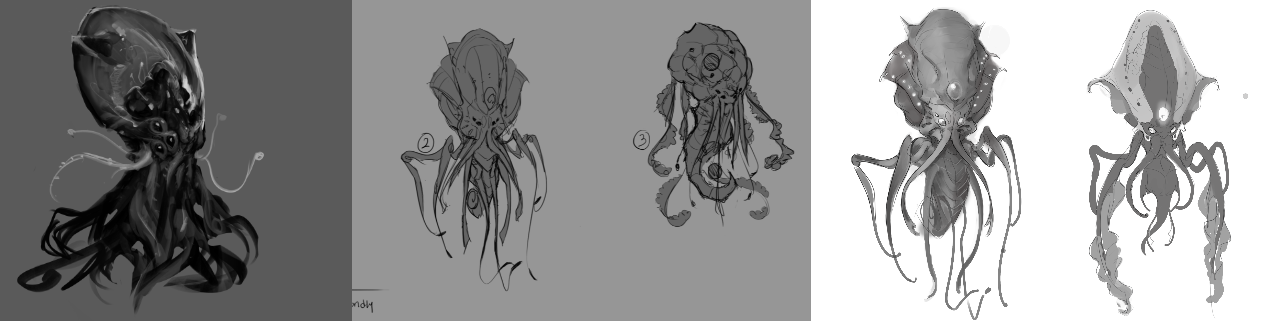 Made by art director Frida Eriksson and artist Emma Jonsson
Several different directions are explored before deciding on a final design.Our artists did a fantastic job with exploring how to convey that this species fits the narrative described before - enigmatic, friendly and hyper-intelligent.
Rendering After creating the final design, our artists get to work with creating a render and adding some values and more details to the design. During this stage, the artist needs to work out the light and shadows. They also need to add more detailed materials.
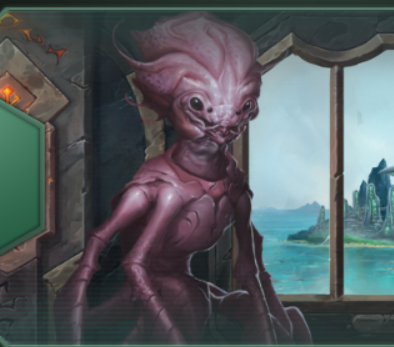
Let’s take a look at our Aquatic Machine Portrait for an example of what a final concept design looks like, and what it looks like after the first step in the rendering process!
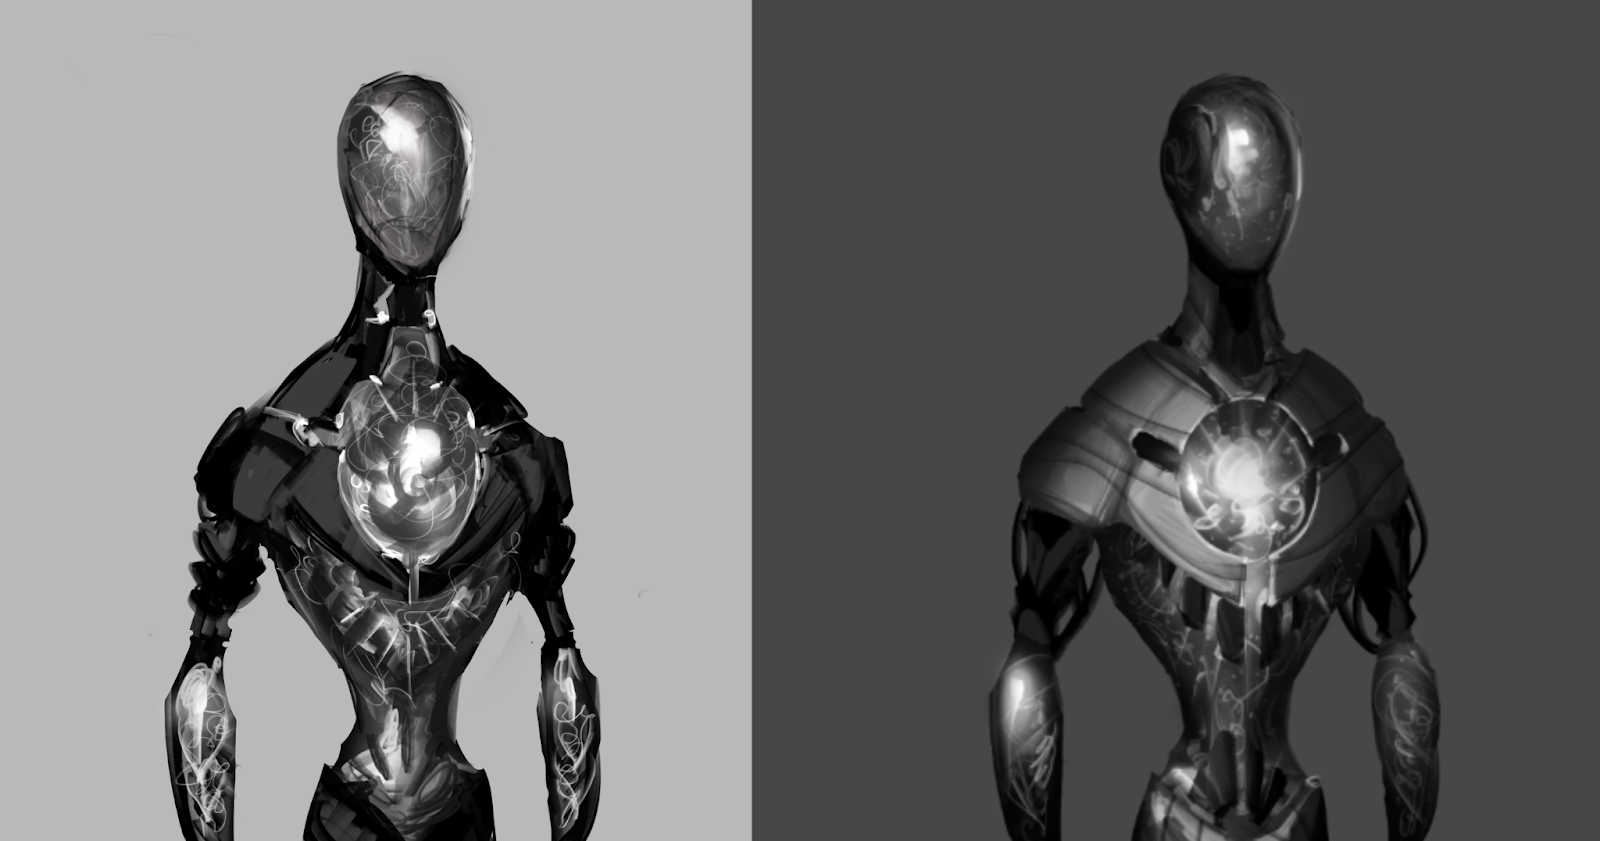 Made by art director Frida Eriksson and artist Emma Jonsson
To the left, you can see the final design and thumbnail. To the right, you can see the rendered version with added values - showing a lot more detail when it comes to lights, shadows and materials.
Colorizing & Refining After that is done, our artists need to refine the rendering and add some colour variations! Our artists take very careful considerations with what colors to use. It all needs to fit the overall theme and connect to the narrative! The species design needs a narrative red thread through all steps from start to finish, and color variations play an important role in that.
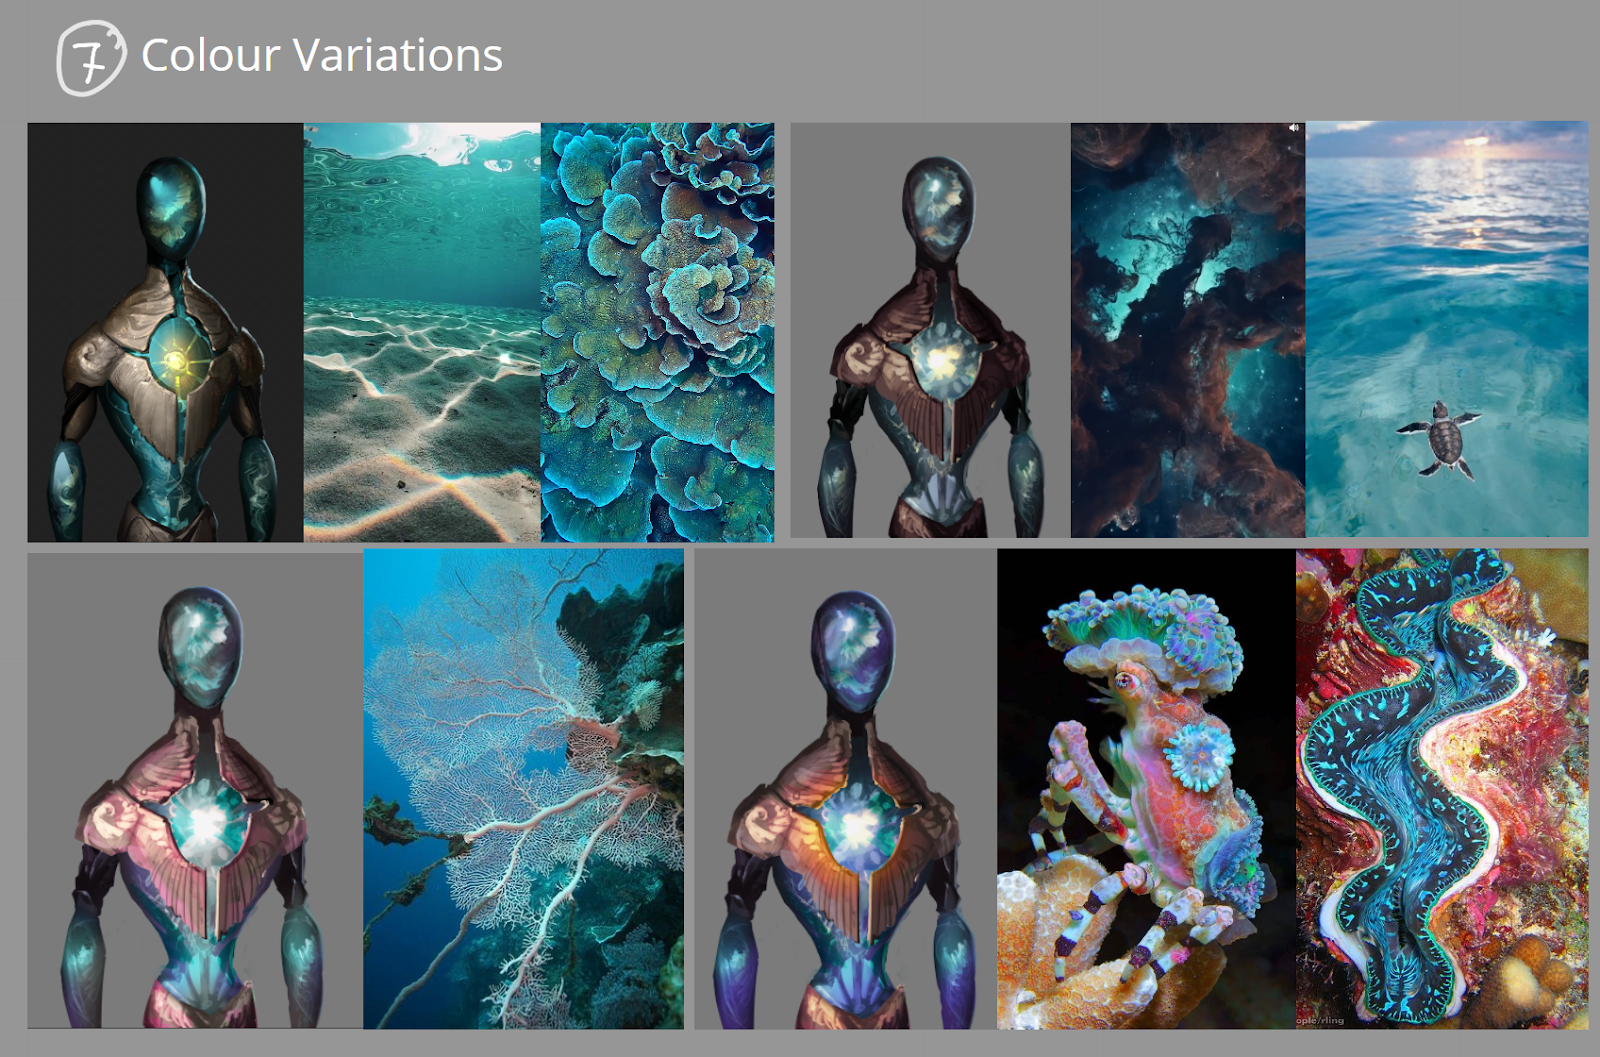 Made by art director Frida Eriksson and artist Emma Jonsson
Our incredibly talented artists spent a lot of time polishing the colours. They used colors and materials found in our oceans as a main source of inspiration, to make sure even the color variations were aligned with our overall theme.
After this, our artists spend some additional time refining the render and making sure it looks good in-game.
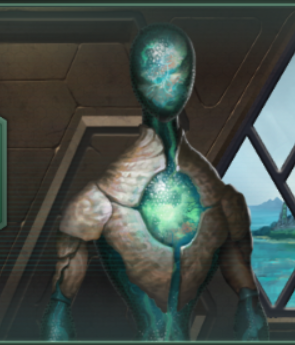
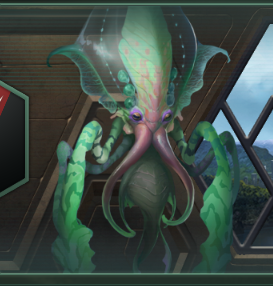
Here are some final in-game versions of the portraits I talked about in this diary!
What’s next? After all that, we’re not quite done yet! We still need to create some clothes for the characters, and most importantly - we need to bring them to life by animating them!
Continue reading and our amazing animator Hanna will walk you through that process..
And portraits and characters aren't the only thing our artists have worked on for the Aquatic Species Pack - they’ve also done quite a bit of other illustrations as well! Nico, our fantastic 2D artist, will show you how he created a new illustration for an event chain in the game further down.
I hope you had fun reading a bit about the process of how species are made! It has been an absolute pleasure to work with this team of incredible artists, and I’m so excited to get to share some of their work with you all.
Portraits & Animation
And now it’s time for some portraits and specifically portrait animations. My name is Hanna Johansson and I did the animations for the aquatic species pack.
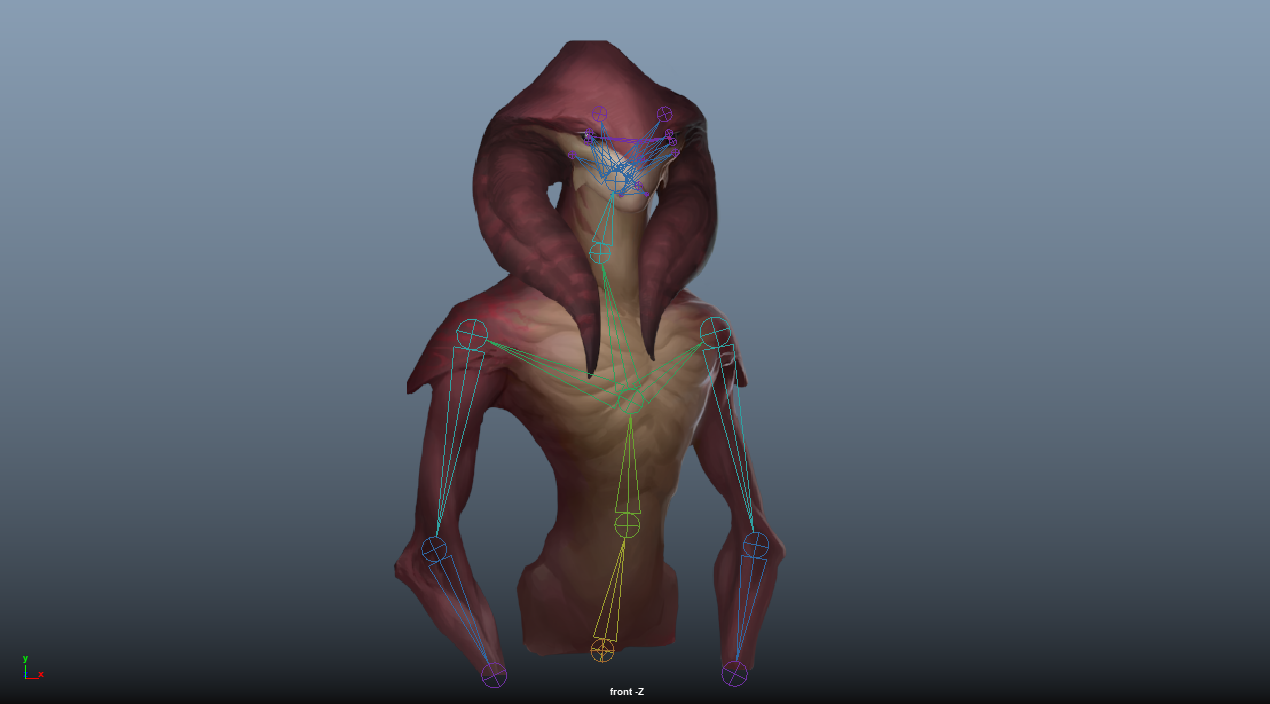
So when the portraits land in my lap this is kind of what they look like; a dissected version of the original concept. This is called a paper doll. For me to be able to animate the portrait the artists need to chop the portrait up into smaller pieces that I turn into individual meshes. Sounds brutal I know, but I promise you that they feel no pain and the other part of my job is to patch them up again. Next, I add some nice topology so that the character will deform in a good looking way.
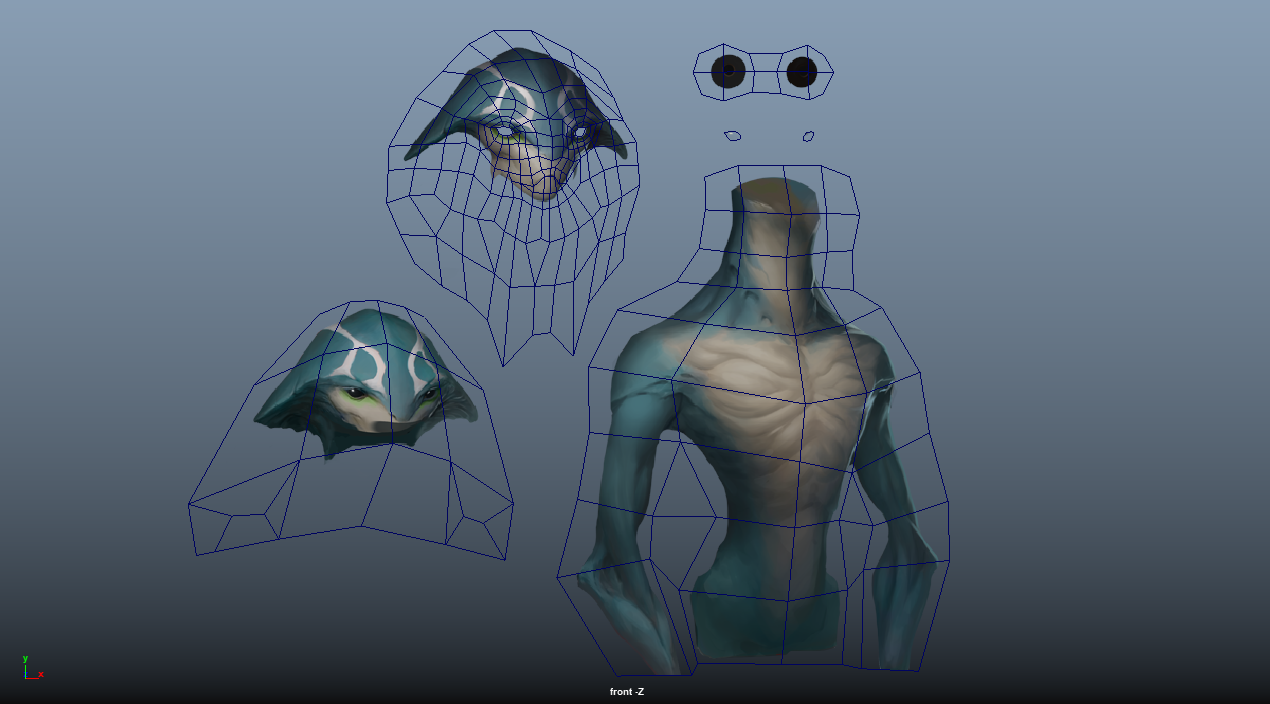
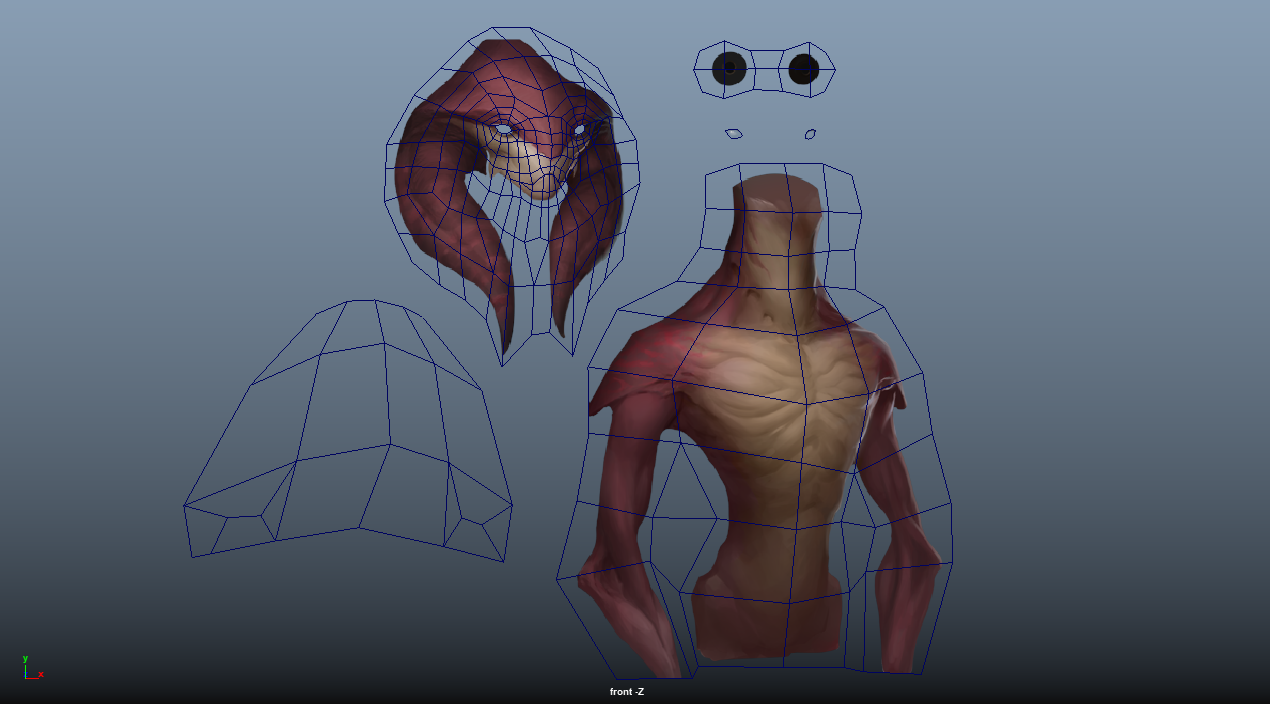 Two different color variations of the shark boy
The next step is to place the meshes so that the character becomes whole again, now shark boy feels much better. Next, I add the skeleton. I place the joints where I want the character to bend or deform to make the character come alive as much as possible. One thing that I do before skinning is placing controls by all the joints. I personally don’t like to animate directly on the joints because they don’t have zero transformation values. By adding controls and constraining them to the joints I have a clean slate to put my keyframes on. Once I’ve added the controls, I skin the meshes to the joints and bada bing, bada boom, the rig is complete!
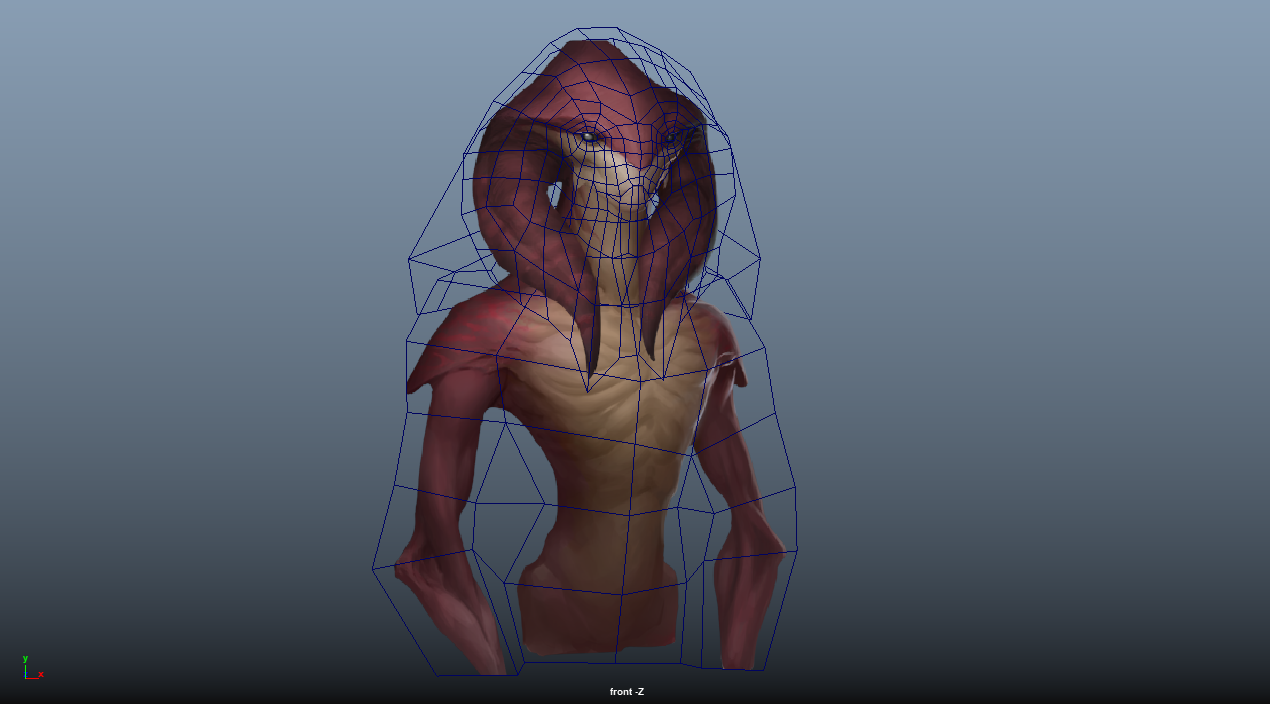
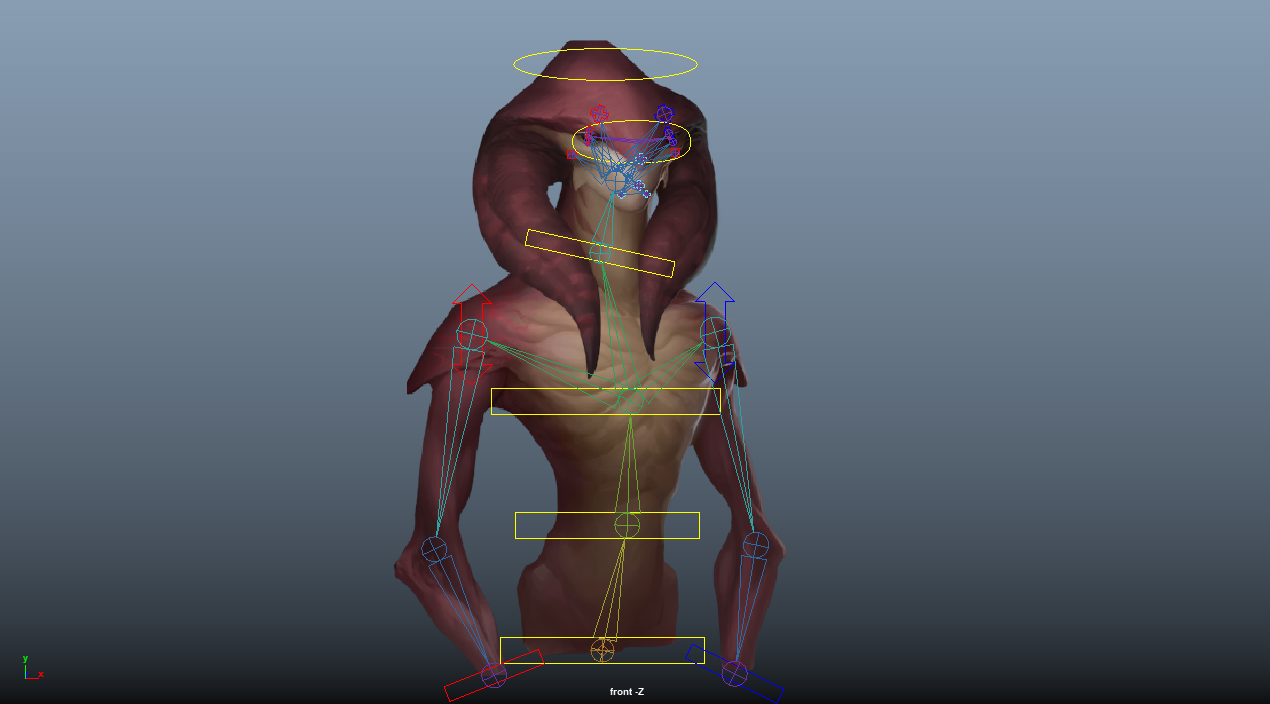 Mesh placement, joint placement and adding controls
Now it’s time for the fun stuff: Animation. When it came to animating the aquatic portraits I really wanted to capture the feeling of characters being underwater. I added a lot of slow and flowy movements and looked at some cool references, like videos of fabric moving underwater and of course, a lot of fish videos. For the portraits we create about 3-5 idles that the characters can switch between. This is so that the movements don't become too repetitive and it also gives an opportunity to create an idle that’s more reactive or moves a lot more, but doesn’t play as often, so it becomes distracting.
To finish off, I’ll show you my top 3 animations that I did for aquatics. These were the ones I found the most fun to animate and made me feel the most inspired when I saw the design of them.
Slimey Slime BoyDeep Sea DwellerCrab People… Crab People 2D Art Hi!
My name is Nicolas Lennman and I am a UI/2D artist working on the Aquatic species pack. In this dev diary I will show you a rough process of how we approach the making of event images for Stellaris.
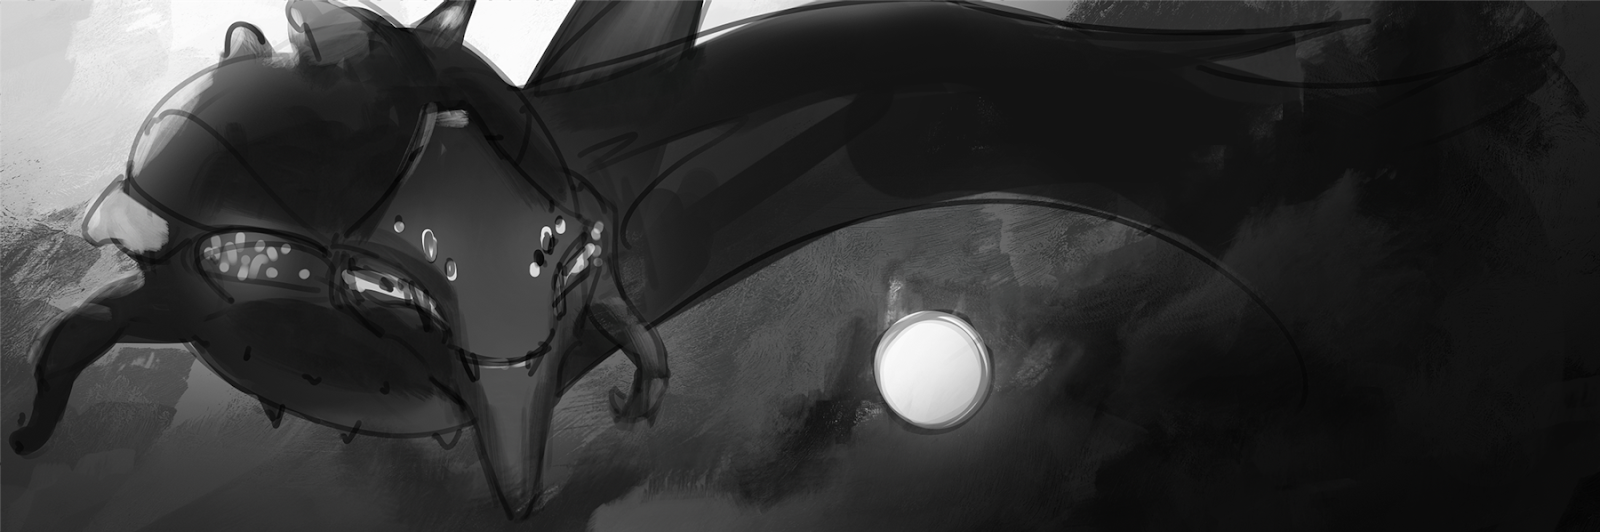
Starting off we (the artists that is) are handed a short brief of what kind of story the event image will try to convey. In this case, we have the new aquatic space dragon which is looming out in space.
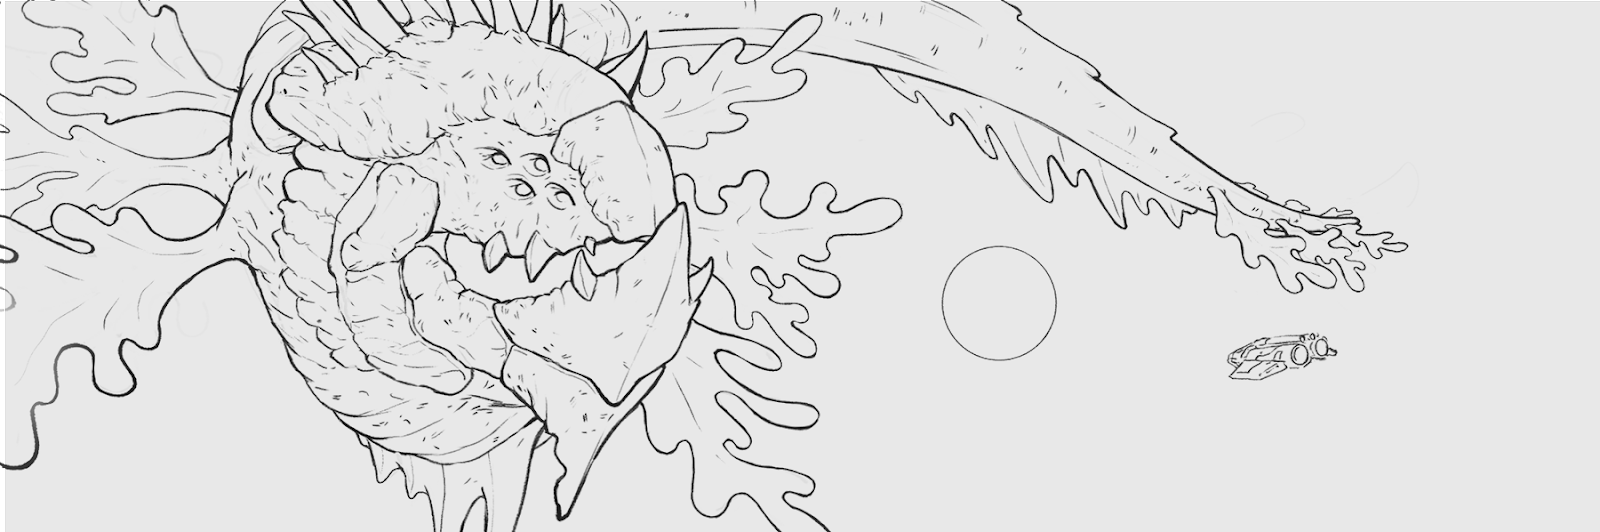
The very first step to creating a more elaborate illustration like this is to create a bunch of simple composition sketches. Just to get a good idea of the basic layout of the illustration, where are the major shapes and values placed. Most of the time one would make a bunch of these quick iterations and pick out the best one.
The next step is to draw the illustration. For me personally, spending quite some time here really helps in the next few steps of the painting. Luckily for me in this case I had a lot of great references to work from provided by our great concept artists and 3D-artists
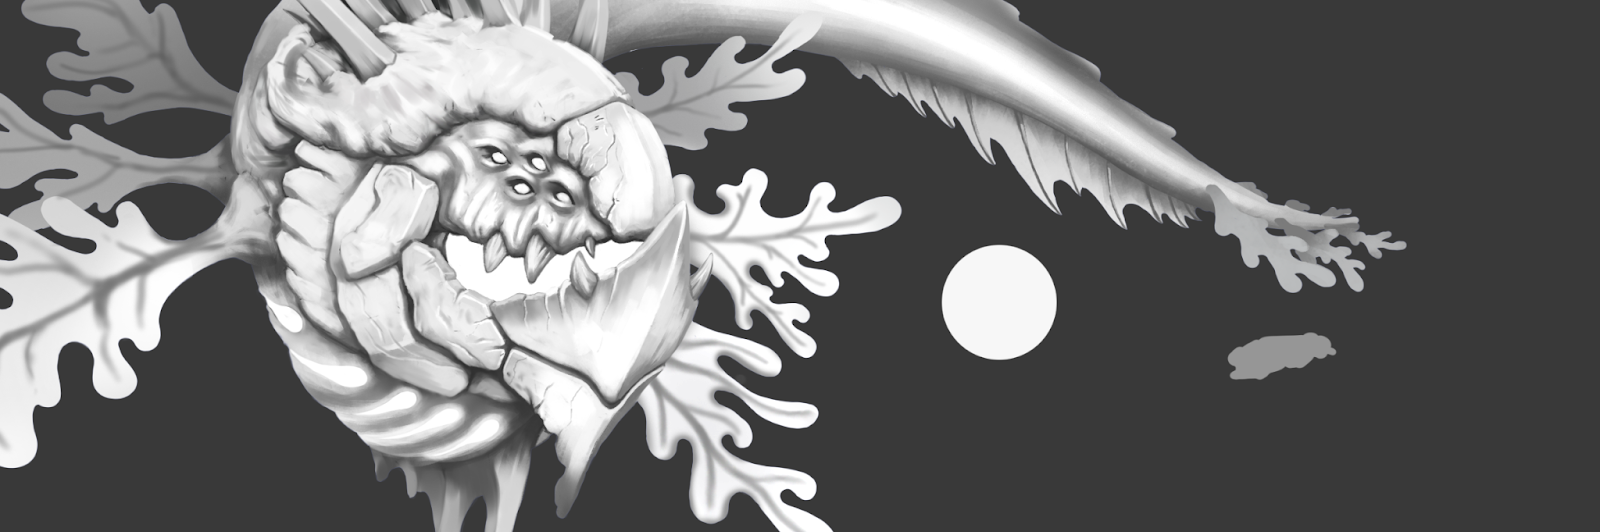
The third step is to make a black&white render. This is to flesh out the shapes and areas of light and shadow. Some artists refer to this workflow as an “occlusion pass”.
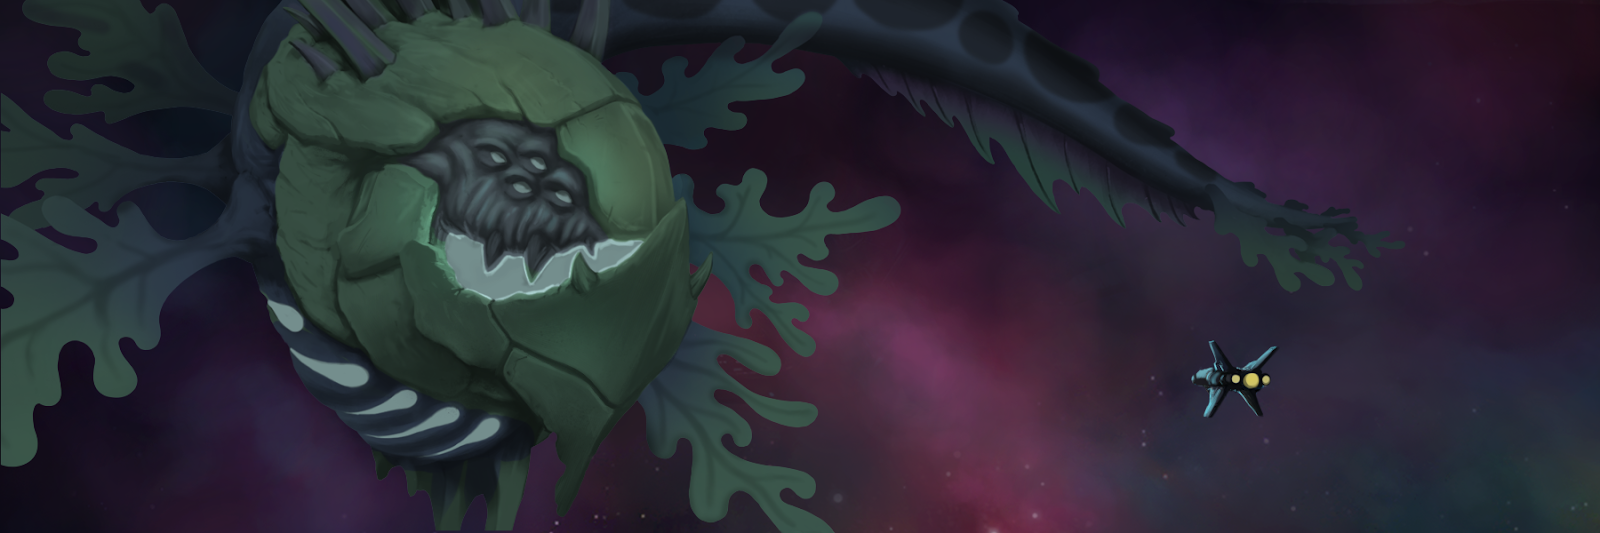
In the next, fourth step, I apply the general colors on top of the previous occlusion pass. Here I spend some time making sure to find nice color compositions and colors that compliment each other. Like in this case how the blue/green of the dragon compliments the red/purple of the background.
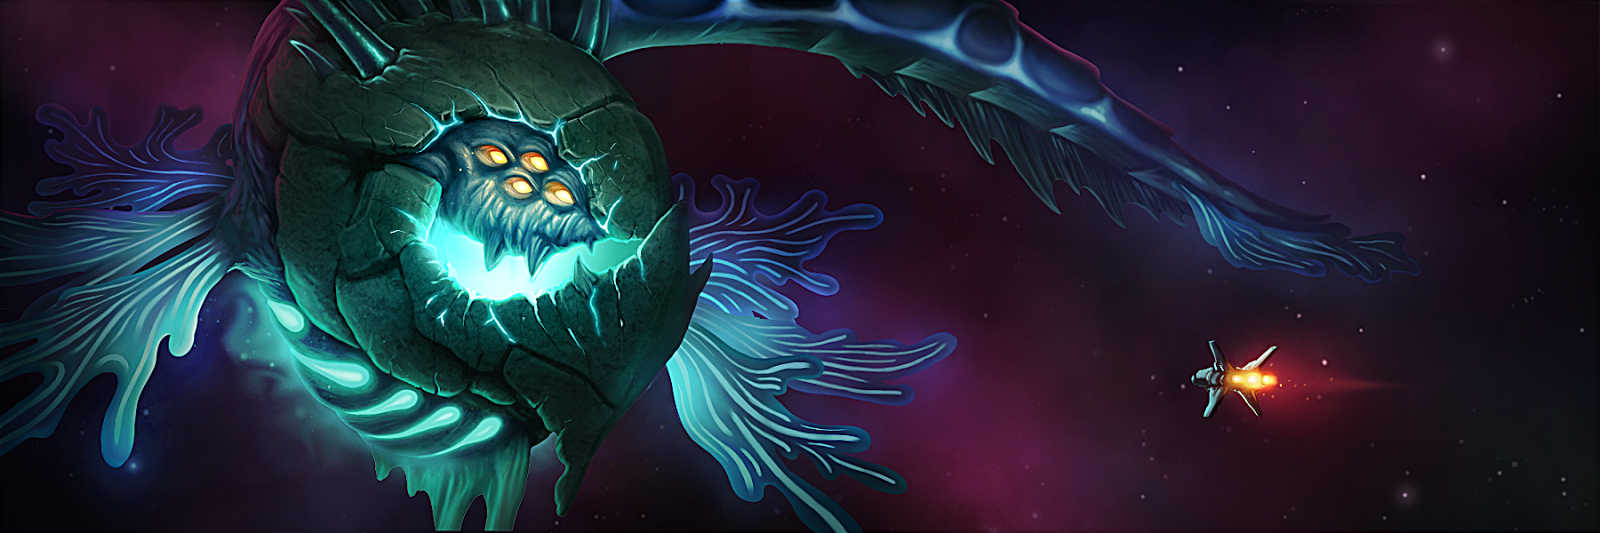
The final fifth step is by far the step that takes the most time. It's the refining stage where all the details, effects and major lights are added. It seems like quite the large leap from the previous stages, but these were crucial to have an easy transition into this stage. The last step is to adjust the values and colors and make sure the illustration really pops!
Thanks for reading!
Wishlist the Aquatics Species Pack on Steam!